CAMMS periodically releases new datasets and your own cammsproject and cammsincident Administrators can also create dedicated datasets for specific custom objects, custom tables, incident registers and incident multi-select fields.
Please note that you have to follow the below steps in order to ensure these new datasets are enabled for use within your cammsinsights application.
- Perform a dataset update to bring new datasets into your cammsinsights application
- Execute and save datasets into appropriate folders
- Assign datasets to appropriate user roles
- Set up default relationships as needed
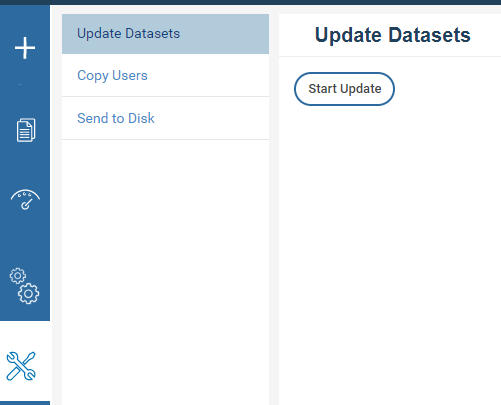
STEP 1: Perform a dataset update to bring new datasets into your cammsinsights application
- Go to Tools > Update Datasets and click on the Start Update button.
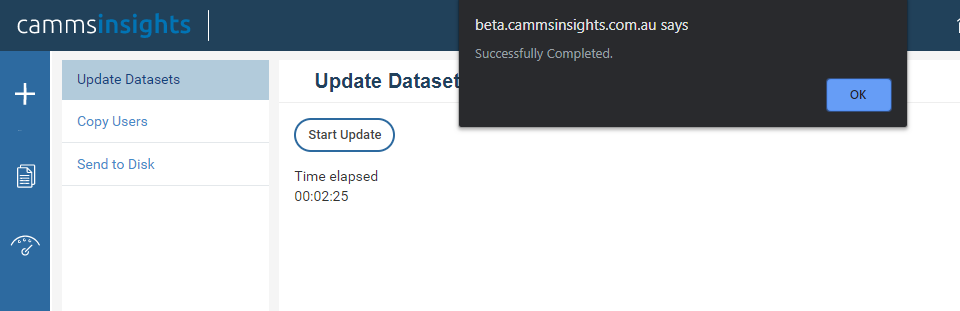
- A timer will start. Wait a few minutes for the update to complete and click OK on the confirmation popup.
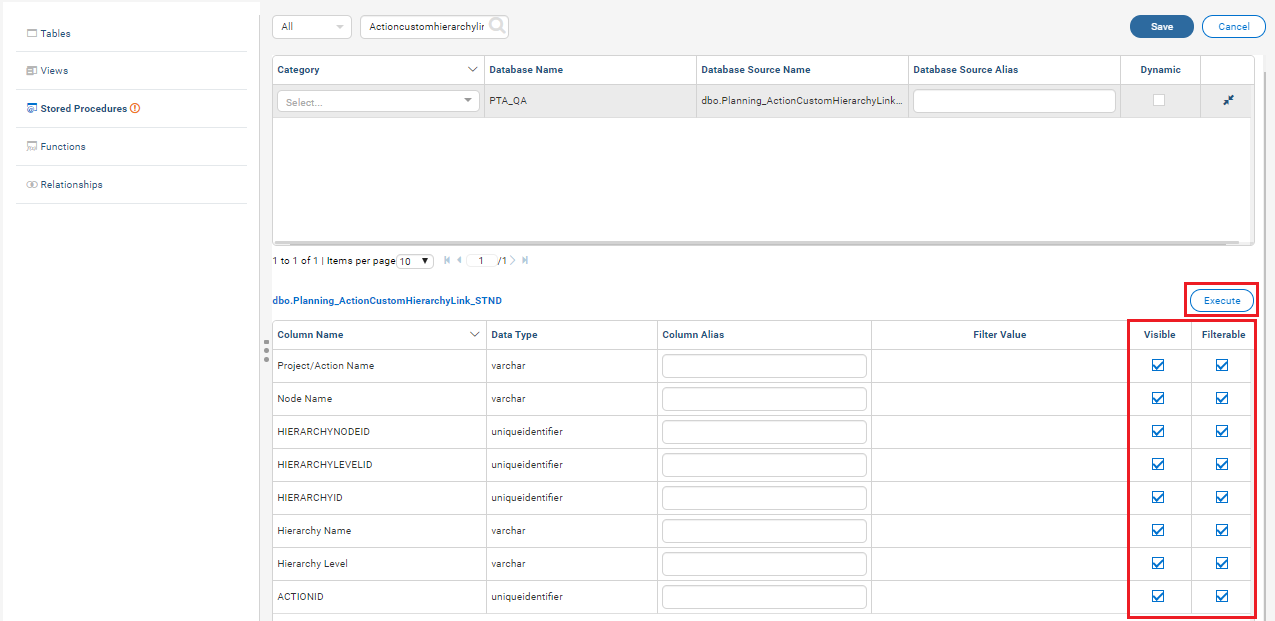
STEP 2: Execute and save datasets into appropriate folders
- Go to Settings > Data Model > Stored Procedures. For each new dataset, follow the below steps.
- Locate the dataset, using the search function and click on it to select. Its fields will appear in the pane below.

- Click the Execute button and wait a few moments for the changes to get executed. You should see that the Visible and Filterable tickboxes for all your fields are now ticked on.
NOTE: Check to make sure all required fields have Visible and Filterable tick on. If some fields do not get ticked on automatically, you may have to tick these on manually.
- Select a folder for your new dataset.

- Click Save.
 NOTE: Don't forget to repeat these steps for all other new datasets.
STEP 3: Assign datasets to appropriate user roles
- Go to Settings > Role Setup and select the relevant Role from the Role List. For each role, that must have access to the new datasets, perform the below steps within the Data Model Access Tab.
- Search for the new dataset
- Tick it on to select. Keep searching for and ticking all other new datasets. Click Save.
 NOTE: Don't forget to repeat this for all other roles that should have access to the new datasets.
STEP 4: Creating default relationships (optional)
- Go to Settings > Data Model > Relationships and click on the ‘Add relationship’ button. A new empty row will appear at the first line.

- Select the elements of the relationship from the dropdown boxes. You must select the mandatory fields marked in red.

- Click the Save button.

NOTE: Don't forget to repeat this for as many new relationships as required.