System Settings
You can access System Settings by going to Framework > Project Settings > System Settings.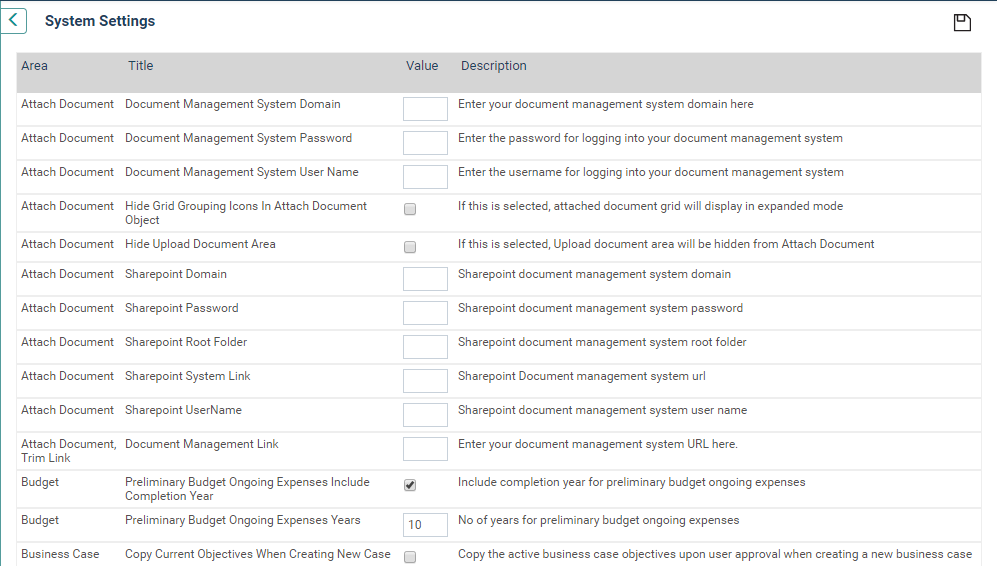
Attach Document
Integration with Document Management system
The system allows you to integrate with TRIM document management system. This would enable you to link and access documents directly from the document management system repository. Affects areas where documents are attached/ accessed. (E.g. Attach documents, custom object)
STEP 1: Enter the TRIM document management system domain
STEP 2: Enter the TRIM document management link
STEP 3: Enter the TRIM document system user name and password and save the settings.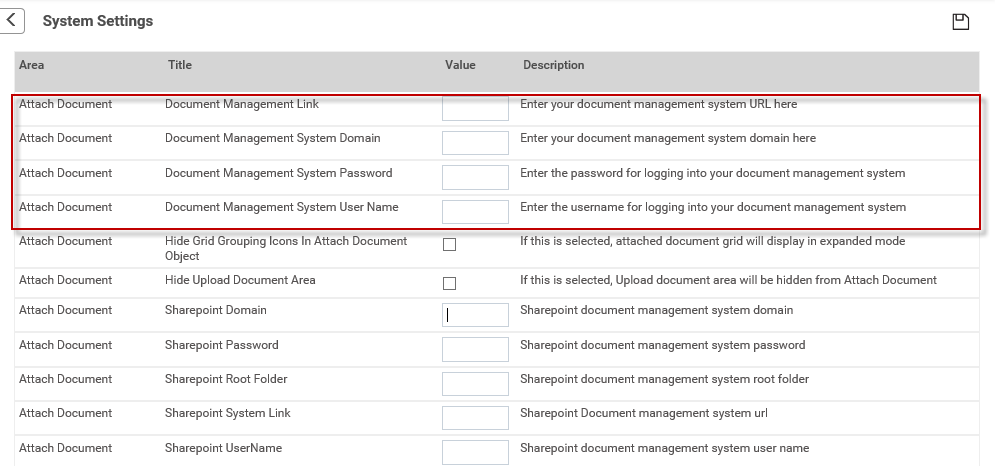
Hide Grid Grouping Icons in Attach Document Object
The attached documents object displays the document links grouped by category (document URLs, Trim links, other URLs). Users are required to manually expand the category to see the documents listed within.
Ticking this would by default, show the attached document grid in expanded mode.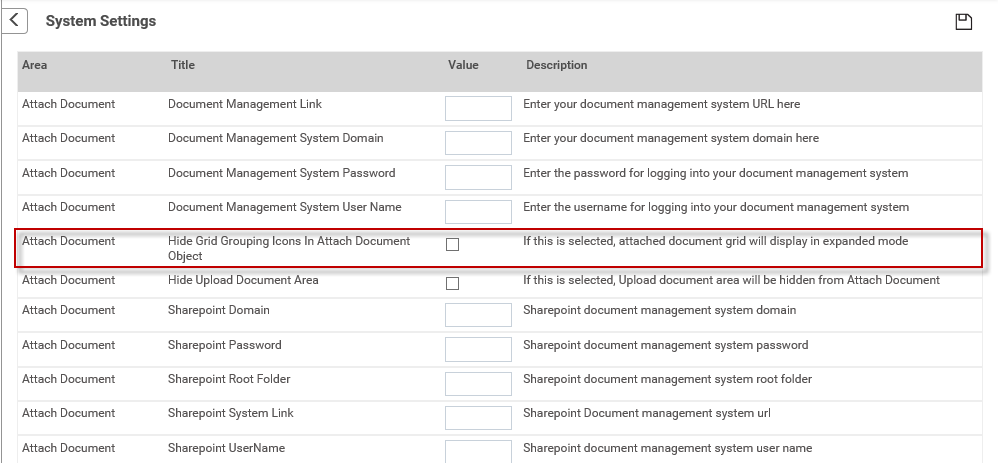
Hide Upload Document Area
When ticked, disables the Upload document area in the ‘Attached Documents’ object. You will only be able to input TRIM links and other links and will NOT be able to upload any documents to the system.
Unticked by default.
Budget
Preliminary Budget Ongoing Expenses include Completion Year
Ticking this will Include completion year for preliminary budget ongoing expenses.
Unticked by default.
Preliminary Budget Ongoing Expenses Years
Define the number of years that you require to record ongoing expenses for.
Budget Information To Be Taken From Project Account Mapping
When ticked, budget values will be taken from the project account mapping.
When unticked, budget values will be taken from action account mapping.
Unticked by default
Show Custom Object Tab in Project Budget Preliminary
Ticking this setting will enable the custom object within the Preliminary Budget object.
Disabled by default.
Show Custom Rich Fields in Project Budget Preliminary
Enabling this setting will show custom rich fields with in the Preliminary Budget object.
Disabled by default.
Show Operational Cost Data in Project Budget Preliminary
Enabling this setting would show the operational cost area within the preliminary budget tab in the Preliminary Budget object.
Disabled by default.
Show Trim Section in Project Budget Preliminary
Enabling this setting will show the document upload area within the Preliminary budget object. This will allow the users to add trim links when configuring the Preliminary budget object.
Disabled by default.
Validate Ongoing Expenses In Project Budget Preliminary
Validate Ongoing Expenses In Project Budget Preliminary
Business Case
Copy Current Objectives When Creating New Case
Ticking this would allow you to copy the active business case objectives when creating a new business case.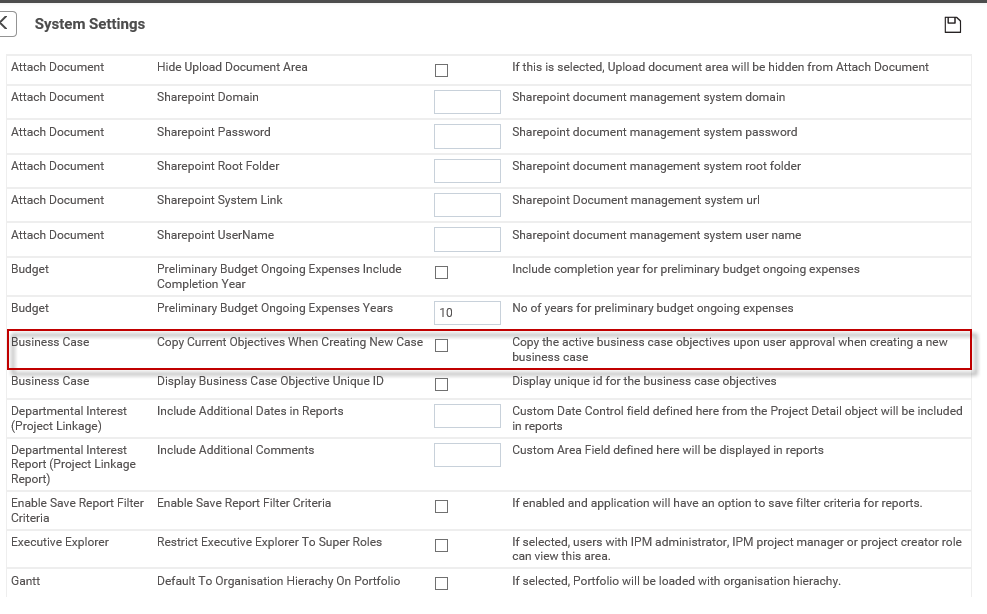
When a new business case is created, a pop-up window will be displayed from where you could select to apply the current business case objectives to the new business case.
Unticked by default.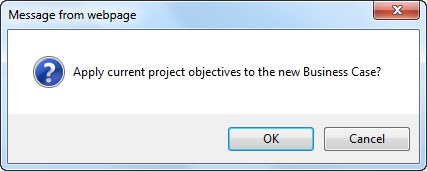
Display Business Case Objective Unique ID
When ticked, assigns a unique ID for each business case objective.
Department Interest (Project Linkage)
Include Additional Dates in Reports
In order to view additional project dates in the report. IPM administrator can define any ‘Custom Date Control’ here (from Project details object).
Include Additional Comments
In order to view additional project comments in the report. IPM admin can define any ‘Custom Area Field’ here (from Project detail object).
Gantt
Default To Organisation Hierarchy On Portfolio
If selected, Portfolio will be loaded with organisation hierarchy.
Disable Gantt Auto Calculated Summary Task
This setting controls how project duration is displayed within Gantt charts.
By default the system calculates the project duration from project task start date and end date from the bottom level.
When ticked, the Gantt chart calculation ignores the project task start and end dates and displays exact project duration as per the project original start and end dates.
Enable Manual Scheduling On Gantt
When disabled, project task dates are set based on predecessors and constraints.
Enabling this setting will allow the user to manually change the start and end dates of a task regardless of the predecessors and constraints.
Therefore, changes made to one task will not reflect on the other tasks that are linked through predecessors and constraints.
Disabled by default.
Initial Duration For a New Task
Allows you to set default duration for a new task. The system default duration is one week (7 days).
Show Full Staff Name on Gantt
When ticked, Gantt chart would display the full name and designation of the task/project responsible person next to the relevant task/project bar.
When unticked, only the full name would be displayed.
Show Tooltip on Gantt Chart
When ticked, Gantt chart would display a tooltip for each column.
When unticked, tooltip is not displayed.
Is Project Duration Based On Gantt
When enabled, the project start and end dates will automatically adjust based on the earliest start and latest finish of the Gantt. Therefore, users will not be allowed to edit the project timelines through the project details page.
When the setting is ON; status will be read only and value should be changed based on the following conditions from the current GANTT;
if all tasks are 'not started' then project is not started
if all tasks are 'completed', then project is completed
if all tasks are 'differed' then project is differed
if at least one task is 'on going' then project is on going
if above conditions are not met then project is 'in progress'
% completed will be disabled and updated from the current schedule
When the setting is OFF (status has no relationship with the schedule); status will be editable and value should change based on the following conditions;
if % completed is 0, then status is not started
if % completed is > 0 then status is in progress
if % completed is 100, then status is completed
- User can change the status to 'on going' and 'differed' but % will not get affected. if status is visible in project detail/quick update then that will be updated. Other status also gets updated if this field is visible.
Changes should be reflected in Project detail and Quick update
Disabled by default.
Issue Register
Disable the validation between Resolve Date and Issue Status
When disabled, entering a validation date for an issue in the issue register object will set the status as 'Resolved' and the user will not be able to modify the status.
Enabling this would allow the users to select a status regardless of validation date being entered.
Disabled by default.
Portfolio
If There Is No Schedule Show As Milestone
Enabling this setting would make all projects without a schedule to be displayed as a milestone in portfolio view.
Project
Allow Calculated Project Progress
If the check box is ticked, the project percentage complete will be auto-calculated using the average of task(s) percentage complete and the tasks will be equally weighted. However, the parent level task 'percentage complete' needs to be entered manually.
Example:
Task 1 - percent complete - 25%
Task 2 - percent complete - 25%
Project percent complete = (task 1+task 2)/2 = 25%
If it is not ticked, users will have to enter a project's overall percent complete manually to the percent complete field which can be made available from the project detail object as well as the quick update page.
Unticked by default.
Duplicate Phases
This would enable you to define a specific set of phases in the workflow that should be enabled when duplicating a project. The phases defined here will be enabled for selection when duplicating a project and the rest of the phases will be disabled (greyed out)
You may define a set of phase numbers and/or phase ranges to be duplicated counting from the start of the workflow.
To define phase numbers,
type in the phase numbers separating them with commas.
To define a range,
type in the range with a hyphen in the middle.
Example:
1,3,5-7,10
By defaults, the text box is left blank and this will enable all phases to be available for selection when duplicating a project.
Hide Finish Tab
Ticking this would disable the Finish tab within all objects. However, in instances where a sign-off is attached to an object, it would act as a finish tab (with sign off functionality) within the object.
Unticked by default.
If There Is No Schedule Target And Actual Is Zero
When enabled, all project with no schedule should have a target and actual of zero.
Omit Positions Permissions For Sign Off General Comments
When enabled, sign off general comments can be entered by any member of current project Board & Team (position permissions are not checked).
Project Administrator Can Edit Baseline Dates
Enabling this setting would allow the Project Administrator to edit baseline dates of any project.
Project Board
Copy Project Board Data To Next Phase On Sign Off Approval
When enabled, upon current phase sign off is approval system would copy current phase data to next phase.
Notify that the primary project sponsor is mandatory
When enabled, when saving Project Board and Team object without defining the primary project sponsor, a message will pop-up notifying the user that the project sponsor is mandatory. However, the user can proceed without defining a project sponsor.
Disabled by default.
Can Approve Projects By Project Selection
When enabled, including a project to the organisational budget within the project budget area will automatically set the project status as ‘Approved’.
When disabled, though the project is included in the organisational budget, the project status will remain as it is.
Disabled by default.
Projects
Project Report Positions
User can include project positions in the below shown reports. Only the Project board & Team positions specified here will be displayed.
- Project Status report
- Project Scope and Deliverable report (for IPM Premium clients only)
- Project Departmental Linkage report.
Making the GANTT 'Read Only' in Quick Update
When disabled, the 'Current Schedule' Gantt chart within the Quick Update area will be editable.
Enabling this will make the Gantt chart 'Read only'. Therefore, users will not be allowed to updates task through Quick update area.
Hide Budget column in Quick Update
Enabling this would hide the budget column in the Quick update area.
Disabled by default.
Show Total Expenditure In Quick Update
When ticked, displays total expenditure in project quick update area.
Unticked by default.
Sign Off
Go to Close Object when Reject Phase Or Object
When enabled, in an instance where a phase or object is ‘rejected’ during sign off, users are directly navigated to phase where ‘close’ object is placed.
Disabled by default
Maintain History in Project Board and Team
When, ticked, a history button would appear within the Project board and team object. Clicking this would display an audit trail of all changes made to the object. (Only the saved changes would be displayed)
Unticked by default
Stakeholder
Enable To Add Same Stakeholder Multiple Times
When ticked, stakeholder analysis area will allow the users to add the same stakeholder multiple times.
Unticked by default.
Preliminary Budget Ongoing Expenses include Completion Year
Ticking this will Include completion year for preliminary budget ongoing expenses.
Unticked by default.
Allow Members to mark an object as completed.
If ticked. An icon will be placed on the tool bar for all objects. Members with add or edit permissions for the object can mark the object as completed. By default object will be incomplete.
Stakeholder Analysis
 | This is a Premium feature. Please contact CAMMS Helpdesk for more information. |
Stakeholder analysis is a process of analysing the attitudes of stakeholders and can be done once or on a regular basis to track changes in stakeholder attitudes over time. It can be configured using dropdown lists and text boxes as outlined below.
STEP 1: Go to 'Settings Configuration' > 'Stakeholder Analysis'.
Drop Down
Depending on the type of the Stakeholder Analysis required, you can customise the drop down fields available within stakeholder analysis object.
STEP 2: Click 'Add new Drop Down'.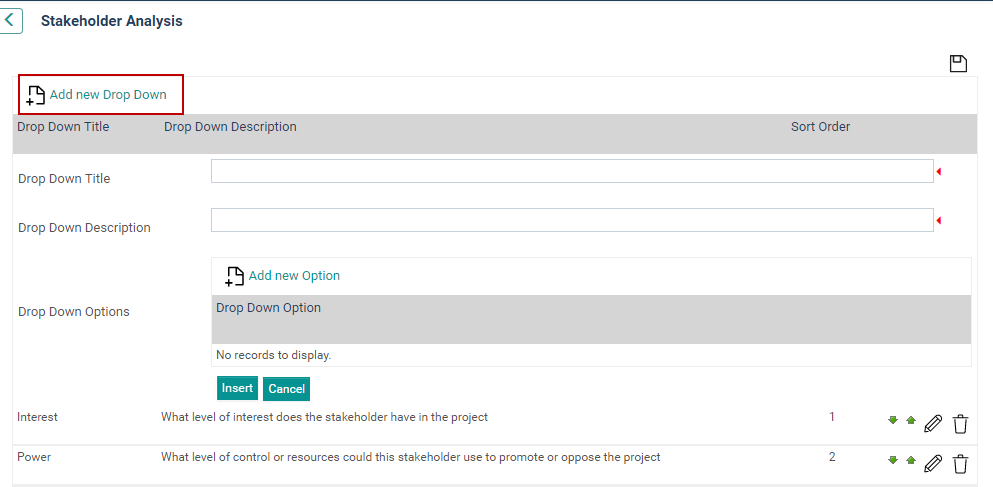
STEP 3: Specify the following details and click 'Insert' to create drop downs.
Field Name | Description/Instructions | Mandatory / Optional |
Dropdown Title | Title of the dropdown | Mandatory |
Dropdown Description | A brief description of the dropdown field | Mandatory |
Sort Order | Sort index is automatically assigned by the system | NA |
STEP 4: Click 'Add new Option' to add options to the drop down.
STEP 5: Specify an option name and click 'Insert' to add the option.
STEP 6: All the details can be modifiable. Use 'Edit' to make any changes to the drop down.
STEP 7: Use 'Delete' to remove a drop down. Before deleting the drop down make sure to delete all its dependent objects.
Text Box
Depending on the type of the Stakeholder Analysis required, you can customise the text fields available within stakeholder analysis object.
STEP 8: Click 'Add new Text Box'.
 STEP 9: Specify the following details.
Field Name | Description/Instructions | Mandatory / Optional |
Textbox Title | Title of the text field | Mandatory |
Textbox Description | A brief description of the text field | Mandatory |
Sort Order | Sort index is automatically assigned by the system | NA |
STEP 10: Click 'Insert' to add the new text box.
Asset Configuration and Setup
 | This is a Premium feature. Please contact CAMMS Helpdesk for more information. |
The Asset Configuration area allows configuring an asset hierarchy and the relevant data entry fields which are displayed to the users at the interface level of the project workflow.
STEP 1: Go to Settings > Configuration > Asset Configuration.
Adding an Asset Hierarchy
STEP 2: Click 'Add New Asset Hierarchy Level' to add a new asset hierarchy level.
STEP 3: Specify a name in the Hierarchy Name field.
STEP 4: Click 'Save' to add the level to the hierarchy.
The system pops up a screen message giving instructions on how to configure the newly created asset level.

STEP 5: Now you can set up the asset level field configuration as follows:
Field | Description/Instructions | Mandatory/Optional |
Apply this field | Enables this Asset level within the Asset Setup | Optional |
Display in project | Makes this field visible at the project level | Optional |
Title Name | Enter a custom label to be displayed when users browse assets at the project level | Optional |
 | Options for some fields are fixed and cannot be modified (e.g. Asset Name is always enabled within Asset Setup and visible within projects) |
STEP 6: Click 'SAVE' to commit your changes. Repeat this as many times as required to build your tree hierarchy.
STEP 7: Click 'DELETE' to remove an existing hierarchy level. Remember that asset hierarchy levels can only be deleted if they do not have any child assets under them.
Asset Setup
 | This is a Premium feature. Please contact CAMMS Helpdesk for more information. |
The Asset Setup area allows you to define assets as per the hierarchy levels you defined in Asset Configuration.
STEP 1: Go to Settings Configuration > Asset Setup.
STEP 2: Click 'Add New', specify a name for the Asset and enter data as per the fields displayed. Remember these fields will depend on your configuration of them in the Asset Configuration area.
STEP 3: Click the 'Save' icon to add the first asset level.
STEP 4: Click the 'Add New Asset Budget' link if you want to specify a budget for a given year. This will enable you to select a reporting period and associate a budget amount in dollars for the current asset.
STEP 5: Click the 'Insert' button to save the asset budget details.
STEP 6: Once you have created a first level asset, you can proceed to create and enter data for any child assets. Click the '+' sign on the left side of the first level asset name to expand it as shown.

STEP 7: Click the relevant 'Add New' links to continue adding parent and/or child assets as per the hierarchy you configured in Asset Configuration.
 | Total child asset budgets must be less than or equal to the parent asset budget. Once the asset is assigned to a project, the Responsible Officer who is at the highest asset hierarchy level will be assigned as the asset owner in project 'Board and Team'. Other Responsible Officers at lower hierarchy levels are added as 'Project Sponsors' in 'Project Board and Team' |