Configure User Roles
Modified on: Thu, 27 Oct, 2022 at 3:46 AM
Creating User Roles on Community Dashboard
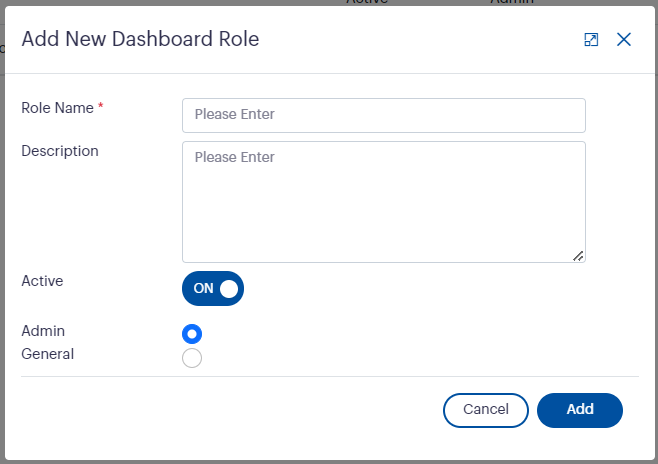
- First the security roles need to be created in the dashboard by Navigating to ‘Dashboard Roles’ section on the admin panel and click on the ‘+New’ new button which is placed in the top-right corner of the window.

- A pop-up window would open to add a role name and description as text fields where the fields will be opened as blank by default. Also, the option to activate these roles will be given in the form of a check box where it would be unticked by default.
- Additionally, you could assign an admin role for any user in your system, which would provide that user with the rights to login to the admin panel of Community Dashboard.
- Click on ‘Add’ button to apply all the additions on to the user role.
Edit an Existing User Role
- If you require to make modifications on to an existing user role, you could click on the ‘Edit’ button placed on the right-hand side against each role. When the edit button is clicked, you will be displayed with a pop-up window to do the necessary changes.
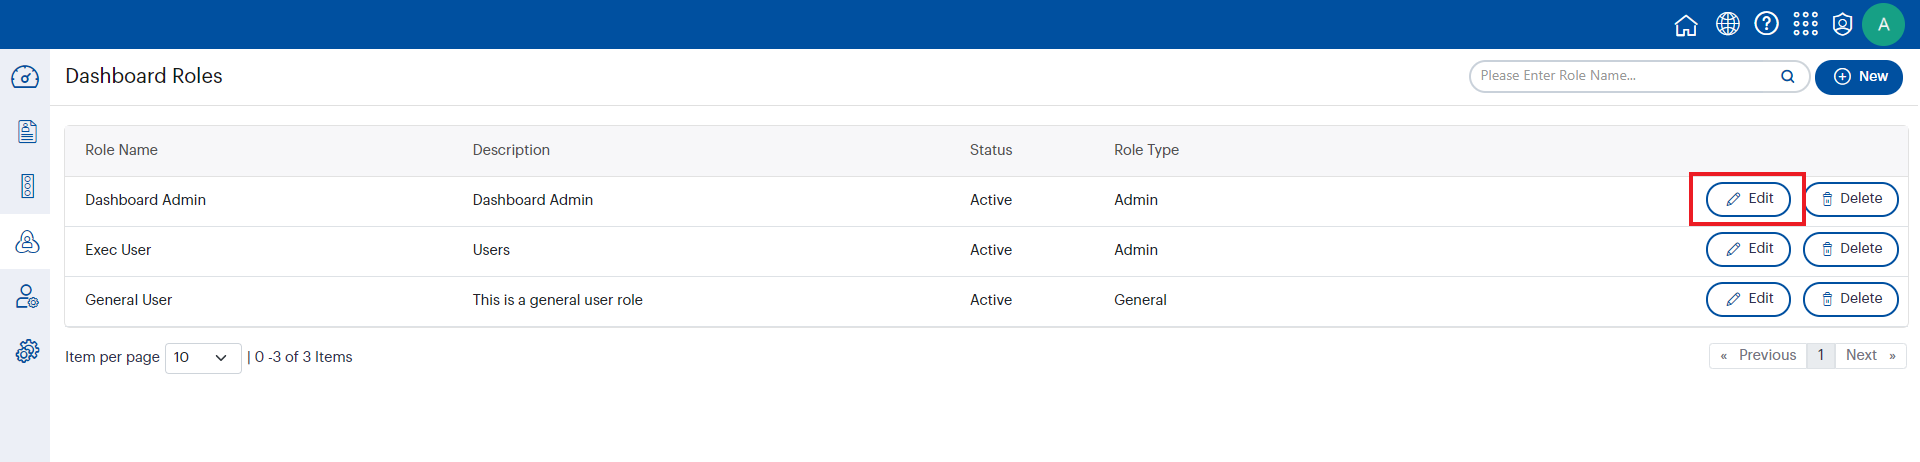
- Once all the changes are saved, they will be applied on to the relevant user role.
Assigning a role for a user
- When you navigate to the 'Dashboard User Roles' tab on the admin panel, you will be displayed with all the users who are added as staff on ‘Camms.Strategy’. A search bar is placed at the top to search the user by their staff name or username.

- In order to add a new role to the users, you could click on the ‘Edit’ button placed on the right corner, which would then enable a pop-up window.

- You could add user roles to users by clicking on the relevant user roles added in the ‘Manage Roles’ window. All the roles which are made ‘Active’ will be available for the administrator to add against each user. Once the changes are saved, they would be applied to the relevant user profiles.
Assign User Roles to the Dashboard
- In order to setup User security roles to dashboards, you could navigate to the dashboard tab on the admin panel where you would see a list of dashboards which had already been created.
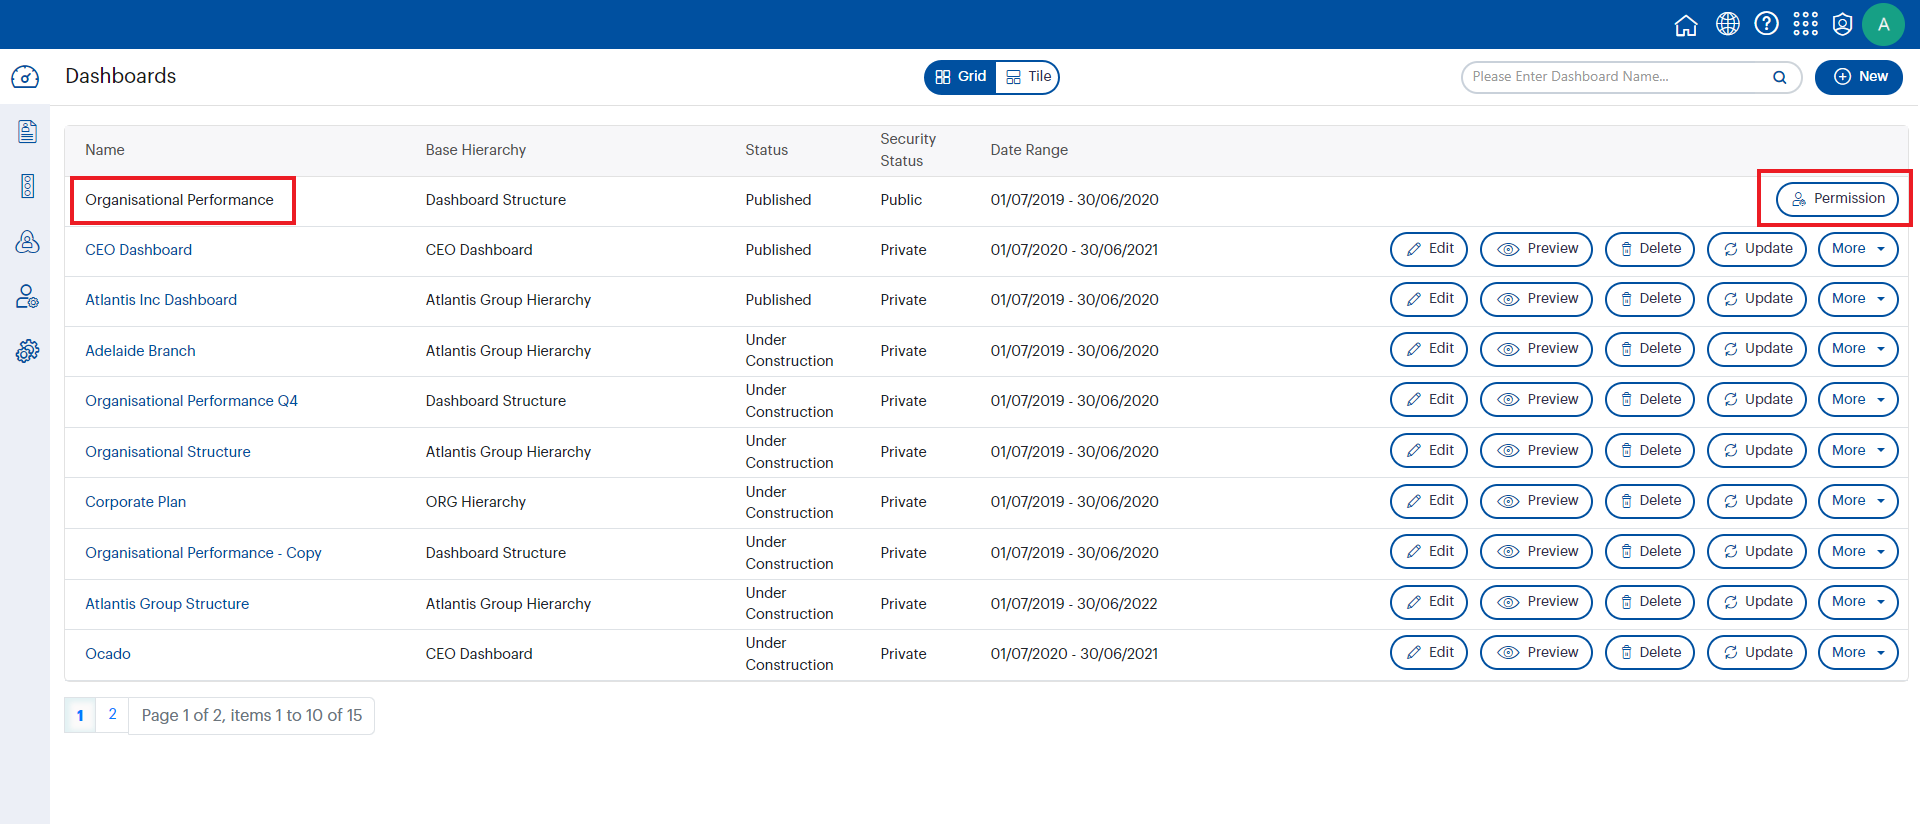
- If you require to add user roles on to dashboards, you could locate "Permission" icon placed on the right-hand side of the grid or you can see it under the "More" button and click on it. It would be displayed with a pop-up window to add the relevant user roles on to dashboards. All the roles which were made active on the ‘Dashboard roles’ tab will be given as options.

- You could define the access levels to user roles by ticking on the relevant check boxes where view, edit and publish functionalities are controlled from. These additions done on user roles will work independently for each dashboard.
- The User roles which have admin rights given on the manage roles tab should have all the options ticked on by default. The dashboard designer will then have the option to change the access level to the dashboard for each role as required.
- When the edit access is given to a user role, it would have the view access enabled automatically. When edit is given to a user role, view access should be mandatory as the dashboards couldn’t be edited without having the view access.
- Users can only access the dashboards as per the user roles given to their staff profiles.
Did you find it helpful?
Yes
No
Send feedback Sorry we couldn't be helpful. Help us improve this article with your feedback.