The Report List page allows users to
- browse reports by type, categories and sub-categories
- search and filter reports
- rename and delete report categories
- edit reports
- copy and move reports between categories
- print or export reports
- email or subscribe to reports
- delete reports
- view report history
Browse Reports
Click on Report List.
The reports are listed in their respective categories and sub-categories.
Select REPORTS or TEMPLATES to view reports of this type.
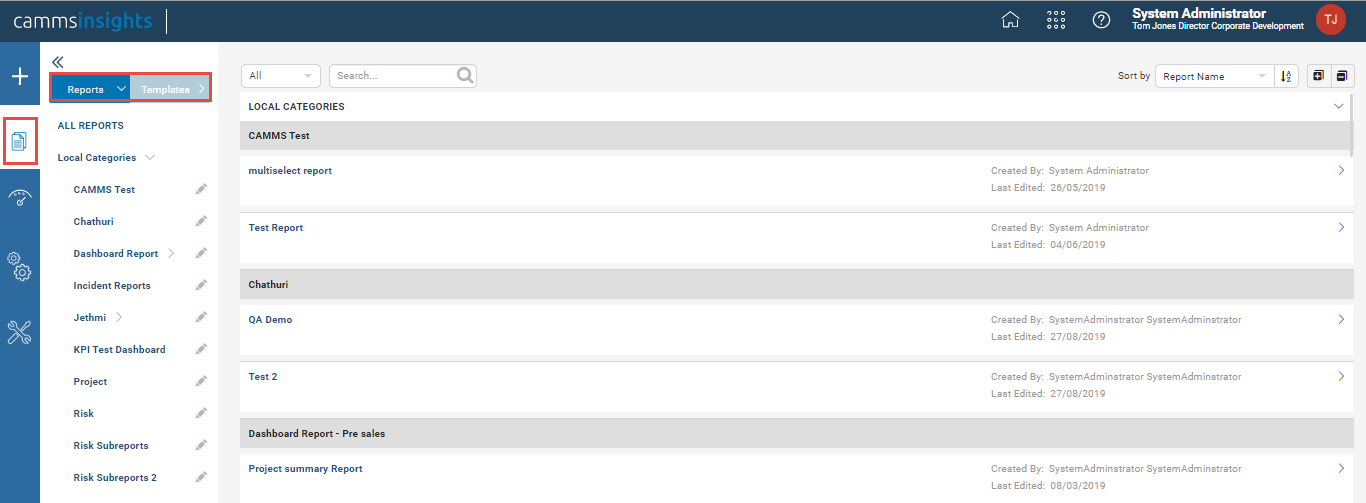
Search for Reports
The Search box at the top allows users to search for specific reports.
Select a specific element to search for in the dropdown on the left of the Search box. Default is All.
Type a partial name and click the search icon.
The matching reports will be displayed.

Rename Report Categories
Click the pencil icon to rename a report category.
Enter the name in place and click the check icon to save.

NOTE: The new name will be checked for duplication with existing categories.
View Report Properties
Click the arrow at the right of individual report records to expand and view that report's properties.

The buttons at the bottom allow users to
- Open (as described in Report Viewer),
- Edit - has two options
- Edit in Quick Edit mode
- Edit in Design mode
- Copy to another name or category
- Move to another name or category
- Print the report
- Export the report to various formats
- Subscribe to the report
- Delete the report
Edit a Report
A report can be edited in one of three main ways:
- Via the Report Viewer which has the capability to give a user dynamically queried results but, since it’s purpose is to allow the user to view data, the user is extremely limited to the Edits they can make (namely, they can edit and save values for visible Filters only).
- The Design Edit mode (which is facilitated through the Report Designer) gives users the power to define a report at its core which includes selecting data sources, modifying exporting options and access rights, and designing the body of the report.
- The Quick Edit mode therefore gives a user a middle ground between the two. In Quick Edit mode, a user can modify existing report parts and edit filters and filter logic but cannot modify data sources, exporting options or access rights.
NOTE: Many business users prefer to leave the Report Design to designated Report Writers in their organisation and retain Quick Edit permission to reports so they can do quick adjustments when required.
Copy a Report
The Copy function allows user to copy a report to a new name and/or a new category and sub-category, leaving the original report intact.
Click the Copy button to open the Copy Report pop-up.
Enter a new name for the report if changing the name for the copy.

Enter or select a new category and sub-category if needed.
Click OK to close the pop-up and perform the copy.
NOTE: The report name will be checked for duplication in the destination category.
Move a Report
The Move function allows the user to move a report to a new category and sub-category, optionally changing the name in the process.
Click the Move button to open the Move Report pop-up.
Enter a new name for the report if changing the existing name.
Enter or select a new category and sub-category.
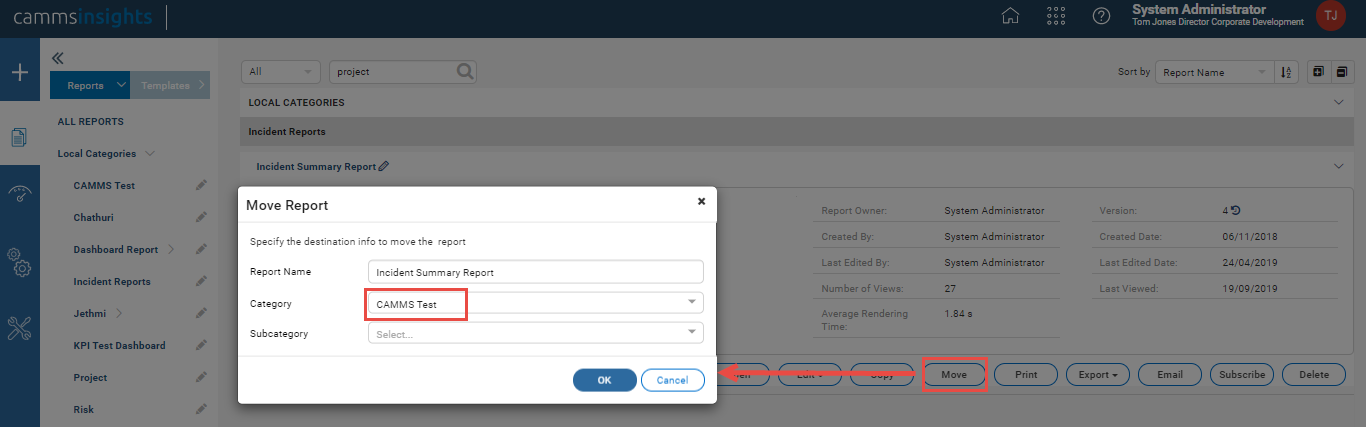
Click OK to close the pop-up and perform the move.
NOTE: The report name will be checked for duplication in the destination category.
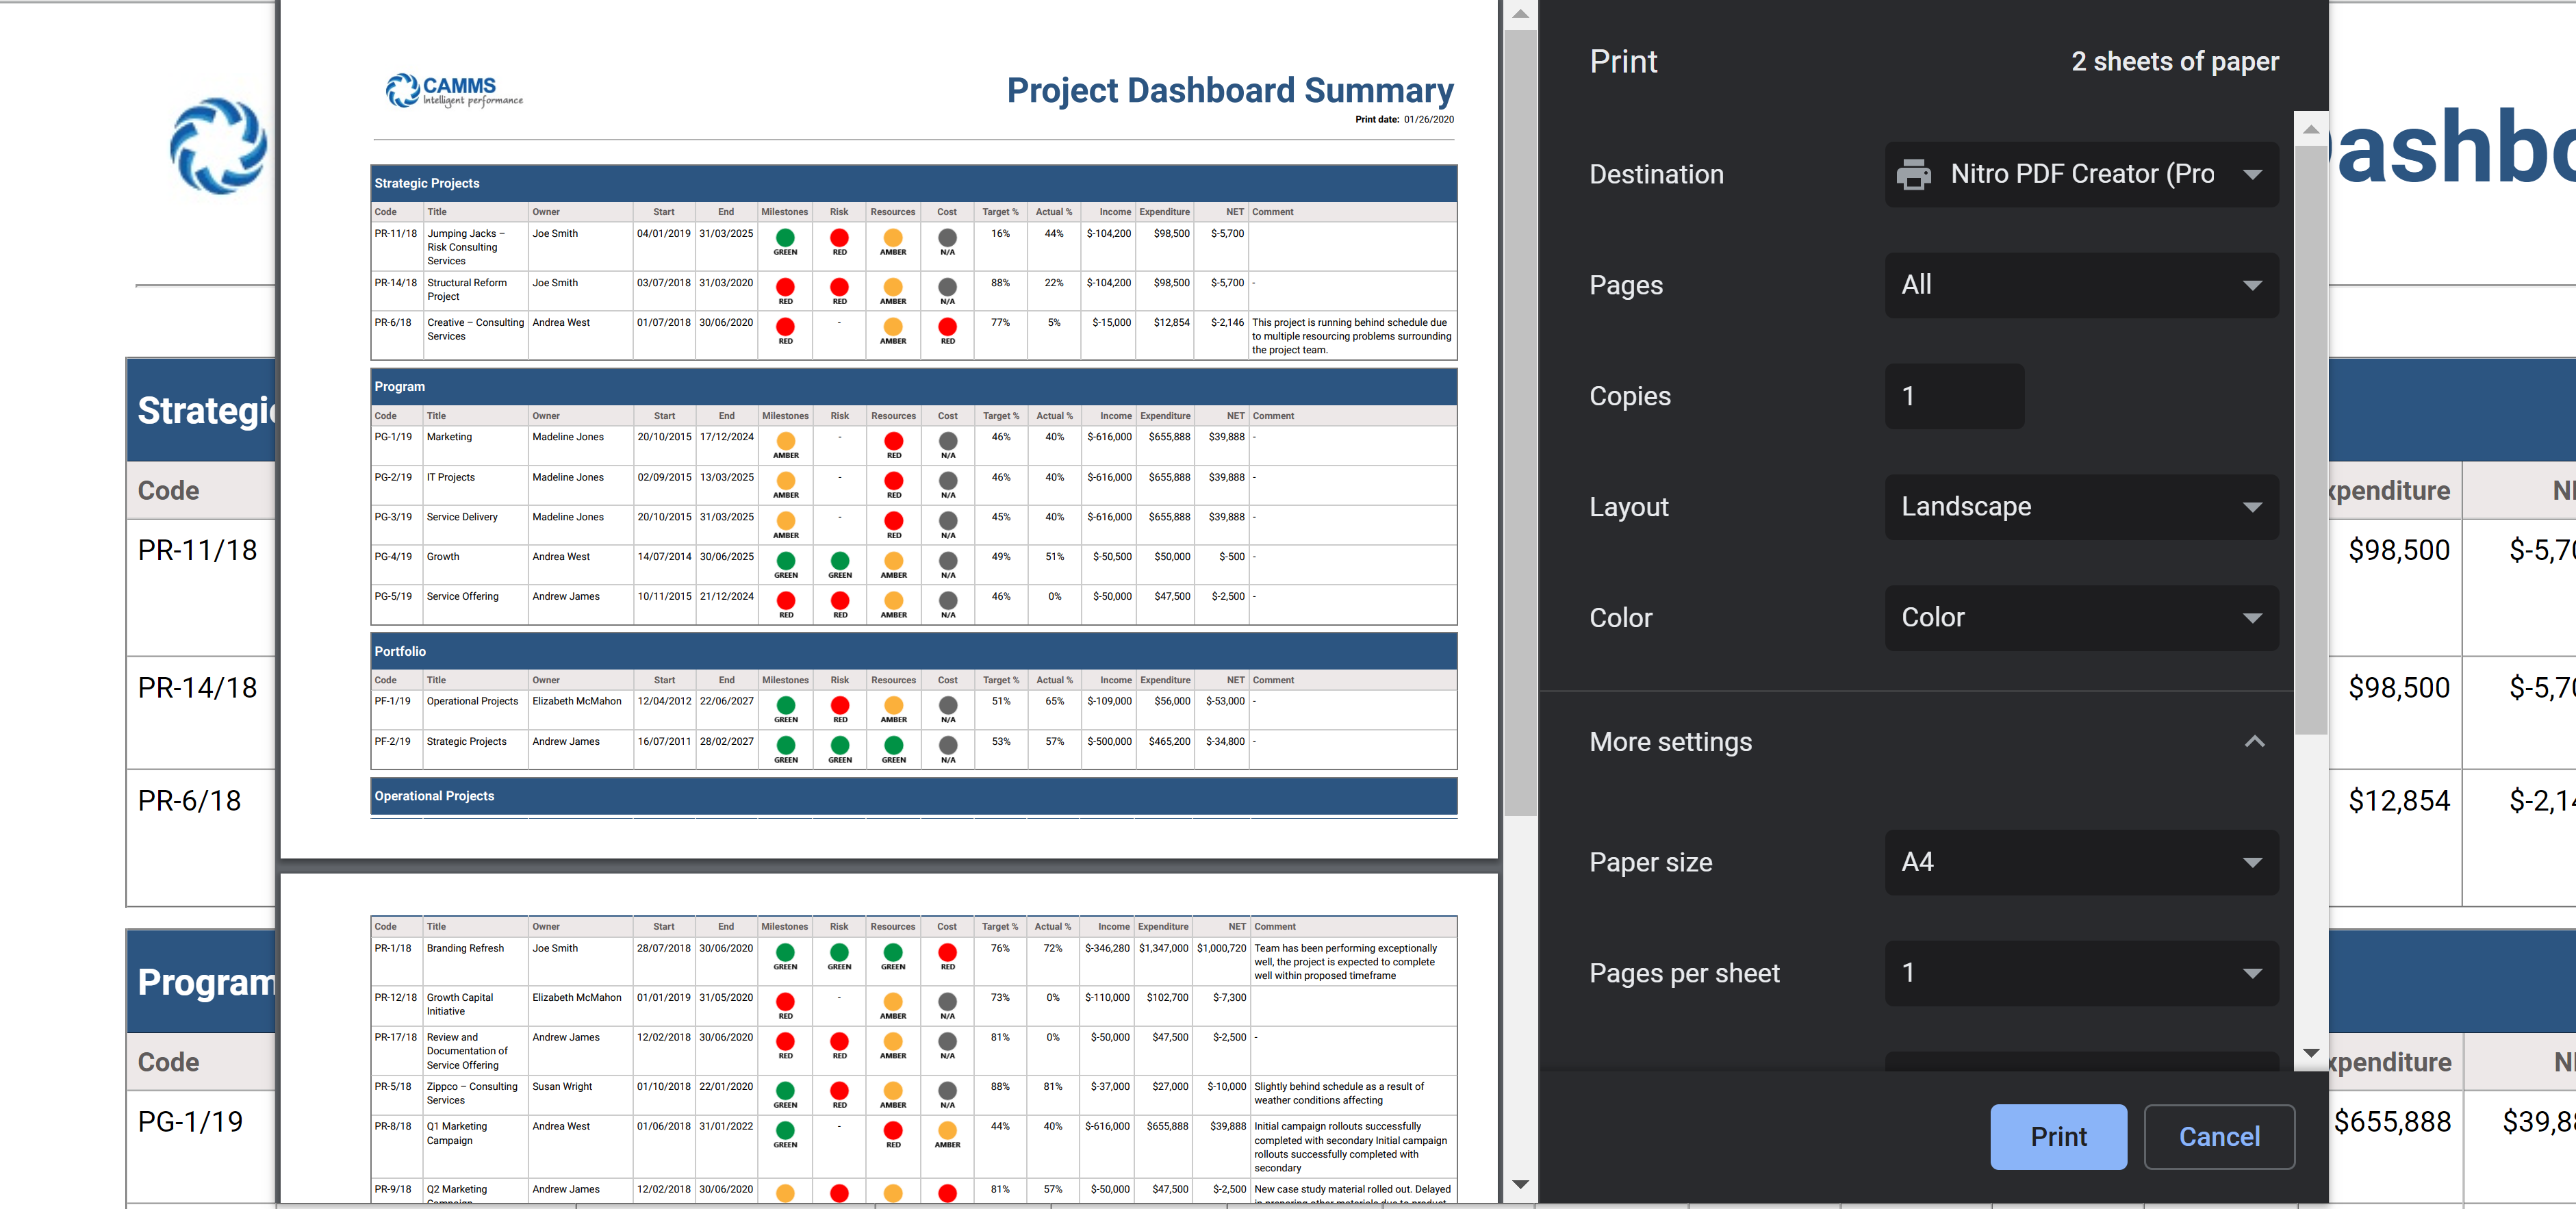
Print the report
Click the Print button
NOTE: Depending on your current browser settings you may be asked to allow popups as the print preview window will attempt to open in a browser popup.
Select your destination printer and other settings and click Print to send the report for printing.
Export the report
Click Export and choose from the options available.

NOTE: The options available to you are controlled by your Administrator so you may see less/more than users based on your user role.
Email a report
Click the Email button to open the Email popup as shown below
 Click the plus icons to select your recipients in the To and CC fields
NOTE: If allowed by your Administrator, you will also be able to manually enter email addresses of users who are not in your system. For example, if you need to send a copy of the report to Joe Smith who works at a different organisation you can simply type in his email address in the To field and press ENTER.
The Email Subject takes the Report Name by default. You can edit this as needed and/or add other system variables which can be accessed via the light bulb icon.

Next select the Delivery Method: email a Link, email an Attachment, or email with Embedded HTML in the body. Whichever you select, remember to add the associated system variable to the Email Body.
For example, if you select Delivery Method as Link, you also have to add the {reportLink} variable to the Email Body.
NOTE: You can combine methods by selecting the Delivery Method as Attachment and adding the {reportLink} variable to the Email Body which will ensure that your recipient gets both an attachment as well as the link to the report.
If the report has visible filters defined you will see them under the Email Body section. From here you can choose to filter for specific data prior to sending. If you don't change this, it will send the report with any default/saved filters
Subscribe to a report
Click the Subscribe button to open the Report Subscription panel.
The report’s current subscriptions are displayed with a summary of the schedule.
Click the Add Subscription button to open the Add Subscription pop-up.

Enter a name for this subscription.

In the Schedule tab:
- Select Subscription Type:
- Subscription Alert: deliver to current user only if it has data at the scheduled time.
- Subscription Report: deliver to current user regardless of whether it has data or not at scheduled time.
- Select a more suitable time zone than the default if needed.
- Select a start date and time in the future.
- Select a common recurrence period from the list, or select Custom Recurrence to define your own e.g. every first Monday of the month.
In the Delivery tab, select your Delivery Type as Email which will send the subscription to the email address of the current user.
NOTE: There is a second option called File Location however, reports sent to File Location can only be accessed by Administrators at this stage.
Select Delivery Method: email a Link, email an Attachment, or email with Embedded HTML body. Refer explanation of how this works in the "Email a Report" section above.
Define your Email Subject, Email Body and Filters also as described in the "Email a Report" section above.

Click OK to close the Add Subscription pop-up.
Click Close to close the Report Subscription section.
View Report History
Click the history icon (similar to ↺) next to the number of versions to open the Report History pop-up.
The report versions together with modified date and user are displayed with the most current one on top.
There are shortcuts for the current version to be opened in Report Designer, copied and moved, or deleted.

Previous versions can be removed if no longer needed, or copied to another name or category then used in addition to the current version.