
Overview
CAMMS is pleased to announce the February Feature Release for cammsincident.
This release includes several new features and enhancements to improve your user experience within the system and is set for 23rd February 2020.
1. Filter incidents by hierarchy in registers.
- You now have a new and improved search filter in incident registers to help you find incidents based on their linkages to organisation and custom hierarchies

Image 1 (a): New filter in register search area |
- The filter will be switched off by default for all registers. You can enable it for both standard and custom registers through Framework > Incident Settings > Register Configuration ticking the ‘Searchable’ column.
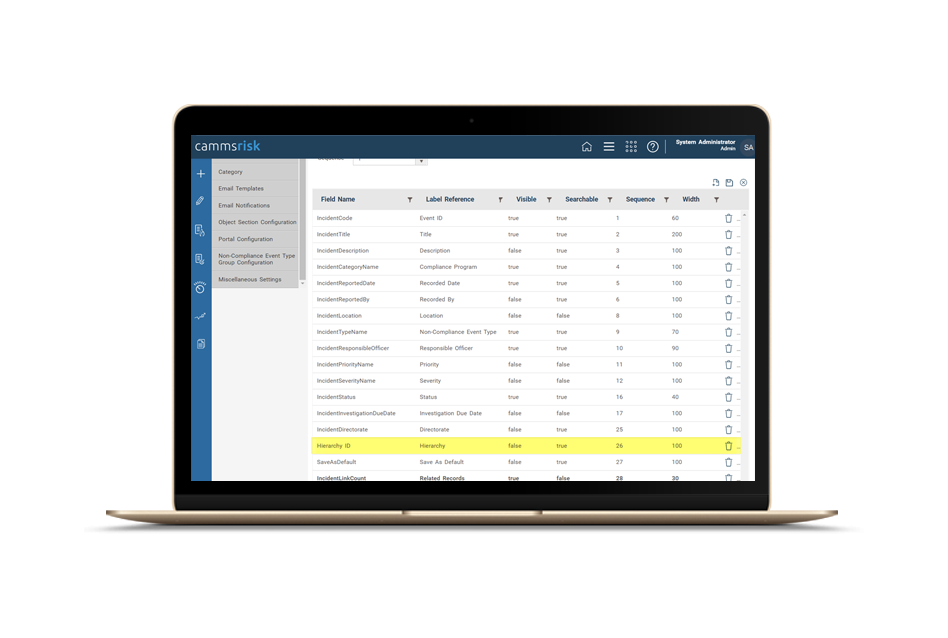
Image 1 (b): Search filter configuration area |
Note: At this stage, the hierarchy option can only operate as a search filter for the registers and not as a column by ticking ‘Visible’. The column will be made available in a future sprint release.
- The hierarchy filter, once enabled, will have a smart search option where you can do a text based search for your hierarchy nodes and the results will populate as a drop down list.

Image 1 (c): Hierarchy search filter |
- Based on the text entered, each matching node will appear here, along with the name of the hierarchy level (for e.g. Business Unit is the name of the hierarchy level which Finance is in) within brackets against the name of the node. For easy reference, the breadcrumb of the full hierarchical relationship, starting from the root level, will be shown beneath each search result.
- Once you have selected the nodes you want to filter the register by, click and select that option and complete the search by clicking on the ‘Search’ button in the register filter area.

Image 1 (d): Make multiple selections |
- The same search filter will replace the existing searching option which was available when searching for the linkage via the Linkage tab as well as the Linkage pop up button.

Image 1 (e): The linkage pop-up and tab will now have an improved search function |
2. Multiple category levels to link incidents
- The incident category field which was previously a multi-selection drop down with only one level, has now been improved to show a hierarchy tree structure with multiple incident category levels.
- This means that instead of just managing your incident categories at one level, you can now opt for more granular levels of categories as well, allowing you to identify and record incidents directly to the exact level.
- The existing field for categories will be improved, allowing you to select multiple values for categories spanning across multiple levels. This function is similar to the hierarchy search above, where it will search for incident categories at all levels.
- For easy reference, the breadcrumb showing the relationship between the searched node and root node will also appear along with the search result list.
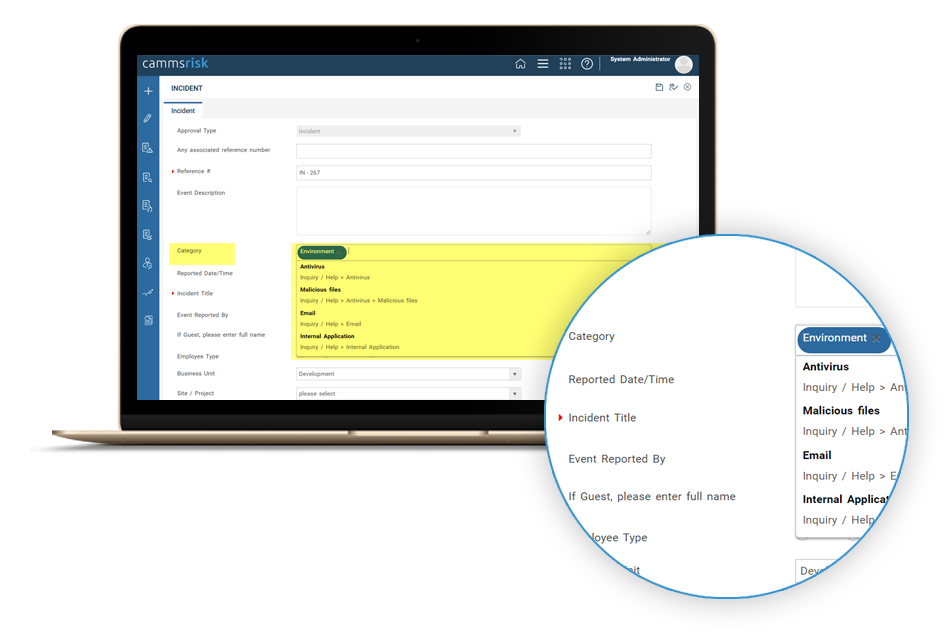
Image 2 (a): Improved category selection for the end user |
- From here, you can make multiple selections and save against the incident as applicable.
How configurations are done
- Incident users with administration permissions can do configurations via the Framework > Incident Settings > Category area.
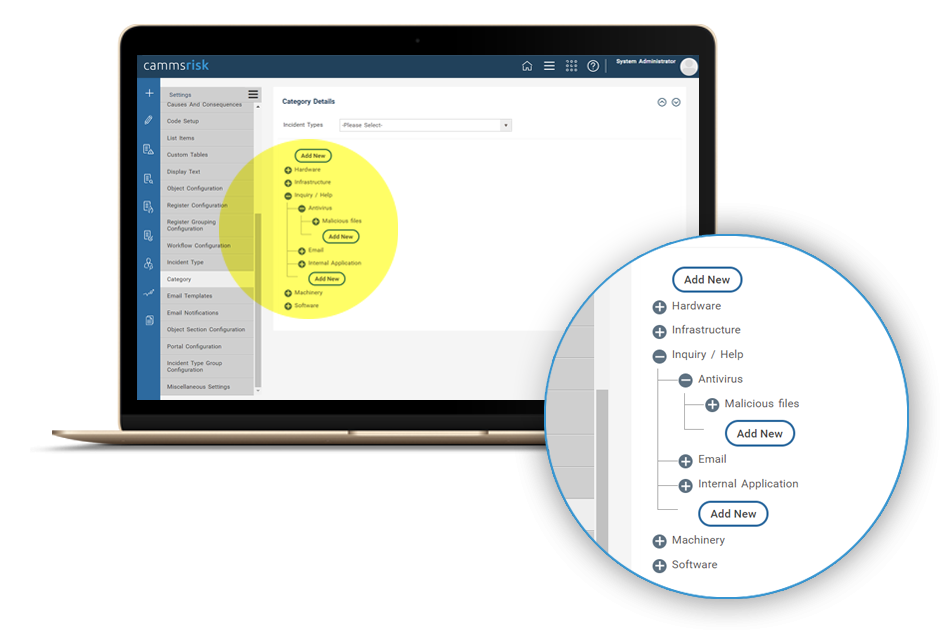
Image 2 (b): Category configuration area |
- You can now create categories specific to a type through an ‘Incident Type’ drop down.
- You can maintain a global list as well, by leaving the ‘Incident Type’ drop down with no selection.
- You also maintain a hierarchical structure for your incident categories, sub categories and multiple 'sub-sub' categories via this screen, by using the ‘Add New’ options at each level.

Image 2 (c): Add new options at each level along with save/delete |
- While the top most ‘Add New’ button allows you to add root nodes, you can click and expand the root node with the ‘+’ button to create multiple levels of child categories beneath.
- By clicking on their names, you can enter and edit the names of the nodes inline. You can also make changes as required underneath the name through the save/delete option.
- Construct your hierarchy tree structure for the categories as required from here. Once all configurations are done, end users will be able to tag incidents against any node from the hierarchy.
- If you wish to view the entire tree at once, an "expand/collapse all" option is available at the top right hand corner of the screen.
Note:
- For clients with insights, the existing datasets will function as it did, and will continue to show the node directly linked to it within the reports. Plans are underway to provide you with a rolled up view of incidents by categories through a brand new dataset, in a future sprint.
- The dashboards (incidents by type and category chart) and standard reports will continue to show the direct linkages of incidents with the categories (at any level) as well as other exciting features. Roll up views for the root category and drilled down views for lower levels categories will be available for you in the future.
3. Cascading custom lists within cammsincident
- Our improved cascading custom lists can now be configured to be dependent on each other, by creating parent child relationships among them.
- This would allow details to be auto populated on to child fields, based on the selections made on a parent field within an incident.
- As an incident administrator, you will be able to pre-define what values each linked child field should be populated based on selections made from the parent list and depending on the mapping of values in the above fashion, the end user view will be populated.
How configurations are done
- The individual fields, both parent and child, will need to be configured as per the existing behaviour via the Framework>Incident settings area.
- Once the list item configurations are done, you can define the parent child relationship between the fields. Please note that many relationships can exist between the fields, where one parent list can have multiple child fields linked to it. However, the relationships will always be of one level and cannot extend to multiple levels of child links.

Image 3 (a): List item configuration area to define relationships |
- To define the parent child relationship, go to the 'List Items' configuration area via Framework>Incident Settings and click and access the parent list item.
- The child fields which needs to be dependent on the selection on parent list selections, should be configured under the ‘List Item Type’ configuration area, where they will be defined as columns.
- While defining what the child fields are going to be as columns, you can add the field type, select the label reference and define the sequence as well.
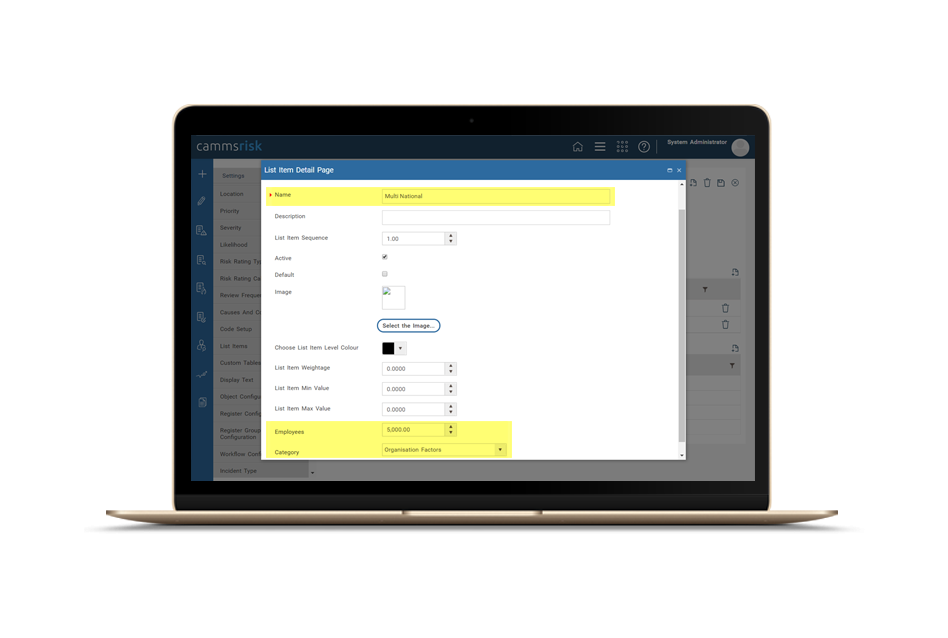
Image 3 (b): Defining the child field values based on parent list item options |
- Once this is done and saved, you can click and open each list item value from the parent list. When the end user selects the given option from the parent list, you can define what the child fields should be auto populated with by navigating to the ‘List Item Details’ page.
- All necessary configurations will need to be completed as above.
Field mapping
- Once the list items and other fields are created, and the linkage between parent/child fields are also done, individual fields should be configured in the object configuration area, for the object the fields its required to appear in. These fields will have a reference to the parent/child fields you created above.
- It should be noted that in-order to build this reference, the field names used in object configurations should exactly match the field names used in the list item/property configuration area.
For e.g. since the parent list item name was configured as OrganisationType and the list item type columns (child fields) were configured as Employees and Category, the field names in the objects should match these field names exactly for the system to identify them as parent/child fields.

Image 3 (c): Exact field names should be used in the object configuration area |
- Once field names are matched and configurations are done as above, a new tab titled ‘field mapping’ will be available within the parent field. Here, you can map the fields configured in the object, with fields configured within the parent list.
- For ease of use, by default the List Item Properties will be auto populated and the fields configured will be displayed against each list item. These can be changed as required.
- Once the field mapping is completed, you can click on the 'save button' to save the changes of the mapped fields.
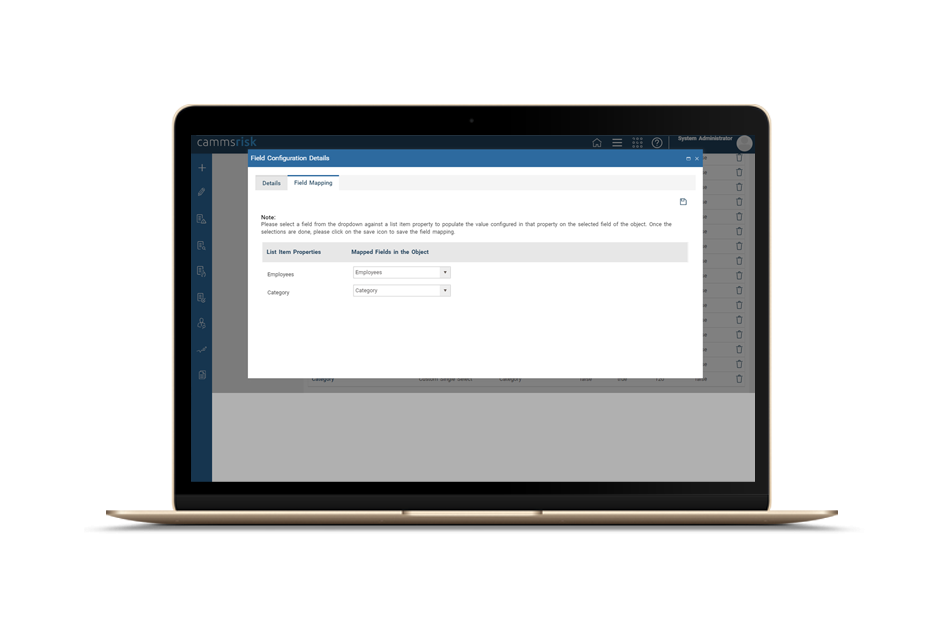
Image 3 (d): Field mapping area |
- Once the field mapping and configurations are done, the end user can access the system where these fields are configured.
- Once a list item from the parent list is selected, all child fields will be auto populated based on the mapped values.

Image 3 (e): End user view for dependent fields |
