Overview
This outlines the steps to be followed in order to import the project schedule (Gantt chart) to Microsoft Project, edit projects tasks within Microsoft Project and export the changes back to the Camms.Project.
Prerequisites
Microsoft Project Professional software should be installed in your machine.
Installation Process
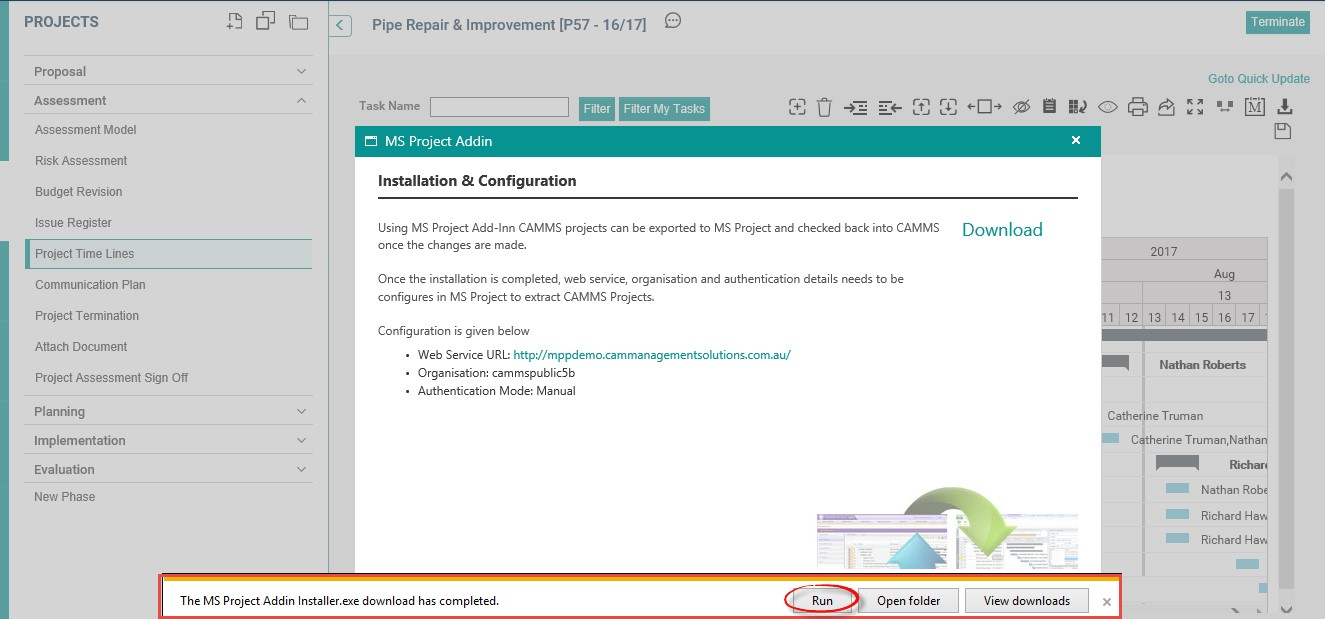
- STEP 1: Open any project and navigate to task planning (Gantt) area. Then click on the ‘Download MS Project Add-In’ icon placed above the Gantt.

- STEP 2: Once you click on the icon, a pop-up will be displayed for you to download and install MS Project Add-In. Click on ‘Download’ link in the pop-up in order to commence the installation.
Your configuration details will appear in the pop-up as well. These details are specific to your environment and you will need these details to configure the add-in in MS project after installation.

- STEP 3: 'Save’ the MS Project Add-In Installer.exe to download the set-up file.

- STEP 4: Once the download is completed, click on ‘Run’.
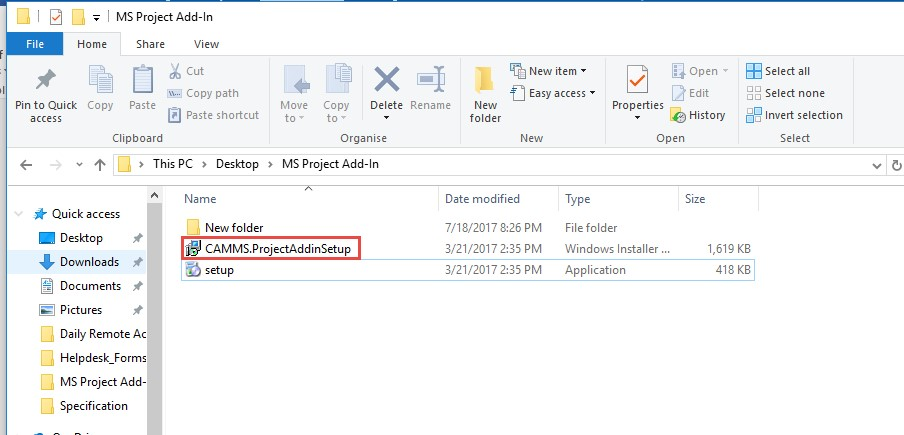
- STEP 5: Next a pop-up will appear to extract MS Project Add-In files. Browse for a relevant location and then click on ‘Install’ button.

- STEP 6: Next, navigate to the ‘Destination Folder’ mentioned above and extract the ZIP files. Then open the folder and click on ‘CAMMS.ProjectAddinSetup’.
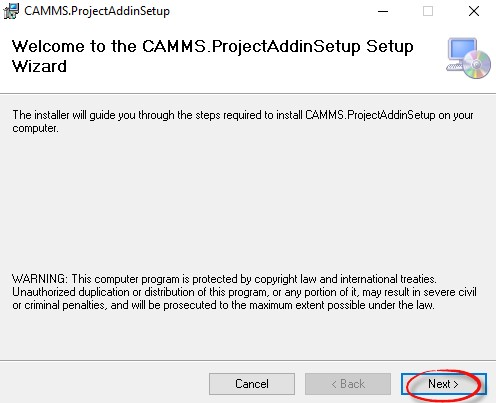
- STEP 7: Once you click, the setup wizard will be initiated. Click ‘Next’ to proceed with the installation.
- STEP 8: Browse for the relevant folder to save the set-up files.

- STEP 9: Click on ‘Disk Cost’ button to view a list of drives available for you to select to install the project add-in. It also includes each drive’s available and required disk spaces.
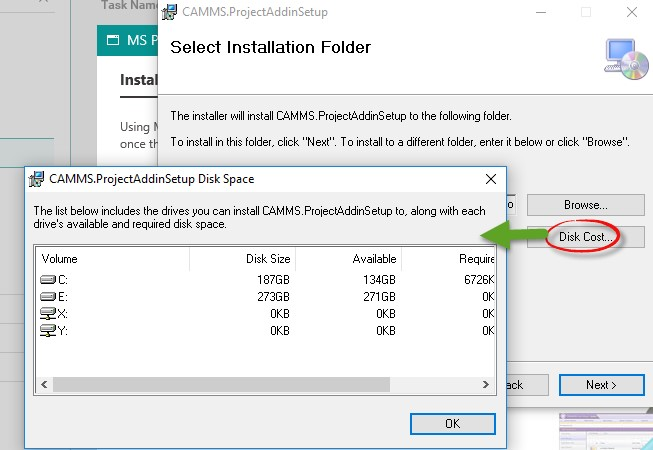
Once you select the folder, click on ‘Next.
- STEP 10: Click ‘Next’ again to confirm the installation.

- STEP 11: Once the add-in is installed successfully, the installation message will be displayed. You can close the dialog-box.

Configuring the Project Add-In
- STEP 1: Open MS Project. Please note that when you open the application, the following message will be displayed. Click on ‘Install’

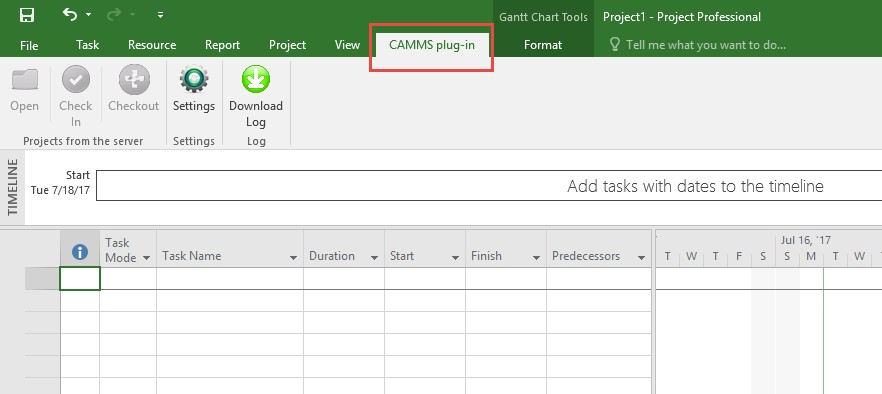
- STEP 2: Select ‘Blank Project’ and navigate to ‘CAMMS plug-in’.
- STEP 3: Click on ‘Settings’ button and the ‘Configuration’ side pane will appear.
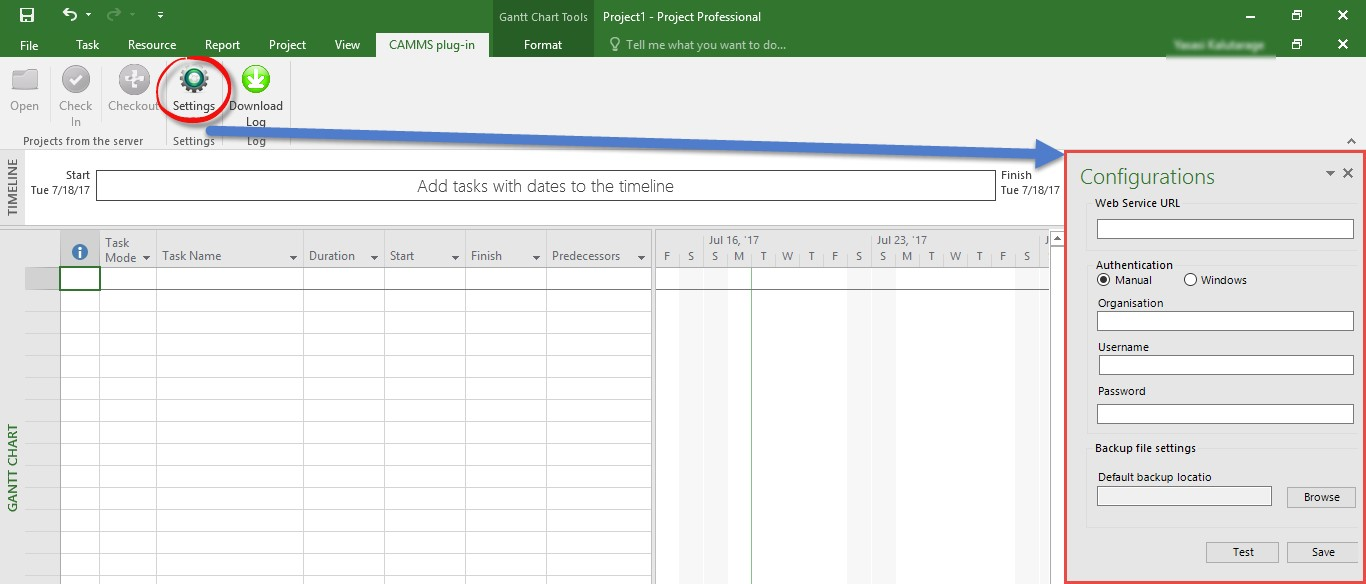
- STEP 4: Add the relevant credentials (Please Refer Section 1 – Step 02) in the ‘Configurations’ area to set up the Add-In.
Note: Authentication mode will be set to ‘Manual’ by default. If you are logged in through windows authentication, then you can select ‘Windows’ option and specify the ‘Organisation’.
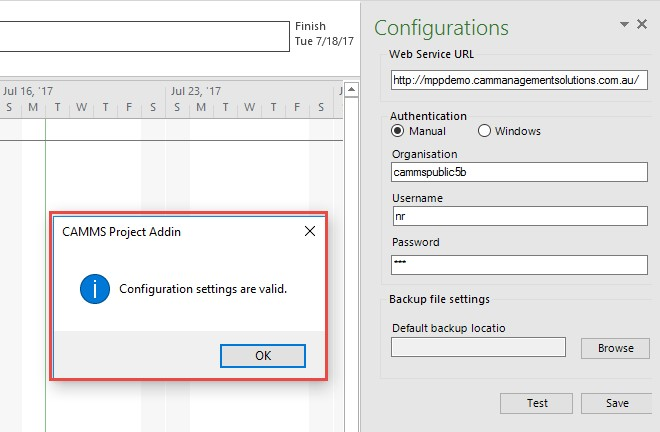
Backup File Settings: The files will be saved to the location specified in ‘Default backup location’ - STEP 5: Once you enter relevant details, click ‘Test’ to test and set-up.

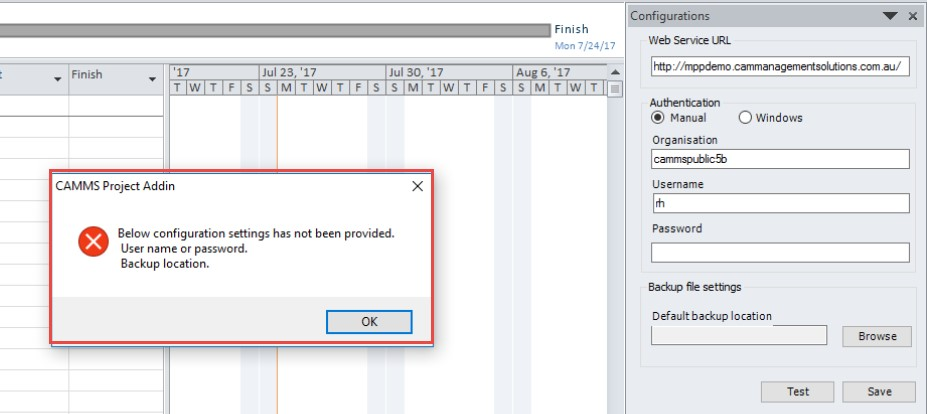
If any configuration details are missing or incorrect, an error message will be displayed:
Warning Message for Missing Credentials

Warning Message for Incorrect Credentials
If the ‘Test’ is successful, the following message will be displayed:
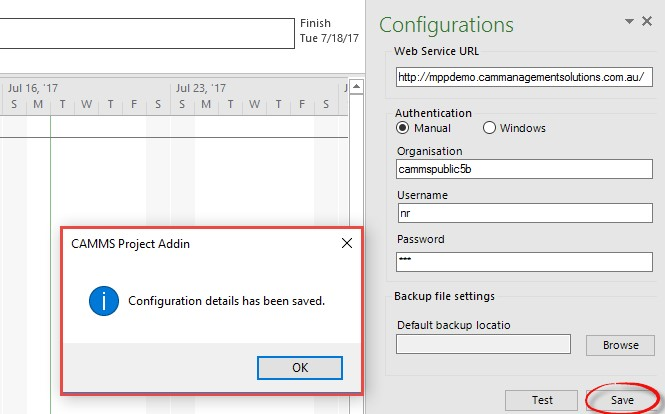
- STEP 6: Click on ‘Save’ button to save the configuration details.
Opening & Editing Projects in Microsoft Project
- STEP 1: Once the above configurations are successfully saved, the ‘Open’ button in the top left hand side corner will be activated. Click on this button and you will be presented with a small window to search for the desired project.
- STEP 2: You can search and locate the relevant project by using the filters given within ‘Select Project’ pop-up.
- Name: Search by the project name
- Code: Search by the project code.
- Owner: Search by the project owner.
- Start and End Date: Search by your projects start and end dates.
- STEP 3: Click ‘Search’ and the relevant projects will be displayed.
- STEP 4: Once the required projects are filtered, select the relevant project and click on the ‘Open’ button to open the task plan within MS Project. MS Project will open the task plan which is in current phase of the project workflow.
The project will be opened in ‘View Only’ mode if you click the 'open' button without selecting the 'Edit Project' option.
Given below are the list of default fields in MS project and their corresponding Camms.Project fields:
Microsoft Project Field Name | Corresponding Camms.Project Field Name |
Task Name | Task |
Duration | Duration |
Start | Start Date |
Finish | End Date |
% Complete | Progress % |
My Status (Outline Code 2) | Status |
Predecessors | Predecessors |
Resource Name | Responsible Person |
- STEP 5: Projects which are opened in 'View Only' option should be first 'Checked Out' in order to save changes to the CAMMS Server. Click on the 'Checkout' button.
You will be prompted with a ‘Save Confirmation’ message and click ‘Yes’ to proceed. - STEP 6: Make any change to the Task Plan in MS Project. You may copy and paste previous MS Project sheets into this checked out project sheet in order to import it back into CAMMS.
- STEP 7: Once you have completed all changes, in order to import the Task Plan back to cammsproject, click on ‘Check In’ button in the top panel.
Ensure that all mandatory fields are completed. Otherwise an error message will be displayed.
Mandatory columns include Task Name,/Start/Finish Date/% complete /Resource Name.

A message will indicate to you once the changes are successfully saved to the CAMMS Server.
- STEP 8: The projects which are already Checked-Out by one user cannot be edited in MS Project by another user. The 'Edit Project' tick box will be automatically disabled for editing. This will also show the person who checked-out the project along with the date.

Once the project is checked-out in Microsoft Project, ‘Add, Indent/Outdent, Delete and Move Up/Move Down’ options will be disabled from the Camms.Project Gantt.
The Administrator will have to discard check-out from CAMMS server in order for another user to edit or else the project will need to be 'Checked In' again.
Download Log
Click on ‘Download Log’ to view the error log: