The Project Board and Team object enables you to identify the key people involved in the initial and implementation stages of the project. The access to specific areas of the project will be based on the allocation of roles to project staff.
- All Staff members must be added to the Project Board and Team in order to assign responsibilities within the project for them.
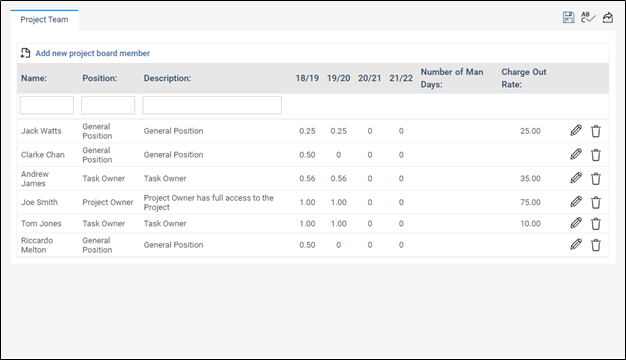
- You will notice that the 'Project Owner' you selected within the 'Project Details' area is already displayed here as the Project Owner.
- Additionally, if this project is linked to a planning element (i.e. action or task), the responsible person of that element will be automatically listed here as the Action Owner.
STEP 1: Click on the 'Add new Project board member' icon.

STEP 2: Specify the following details.
* Fields activated/affected by Premium version are marked with an asterisk below.
Field | Description / Instructions | Mandatory / Optional |
Name | Select the project team member name from the full list of staff. | Mandatory |
Position | Select the project position. Project positions are defined by the IPM Administrator. The security permissions will be different based on the position linked to a user. | Optional |
Description | The description field is auto populated by the definition provided by the IPM administrator for the linked project position. | Optional |
Implementation role | Tick box specifies that the particular role assigned to the project team member is an implementation role - this is for reporting purposes only. | Optional |
Interplan responsible person | Tick box indicates that the user is the responsible person of linked Camms.Strategy action. | Not Applicable |
 | If a user with IPM Administrator or project manager security permission is linked to a particular project role, then security permission assigned for that particular project role within Settings Configuration > Project Position area will be overridden. For any other security permissions assigned for the particular user within staff management area will be overridden by the security permission defined for the particular project role linked to the user. |
You can identify the staff member's involvement in the current project in terms of FTE which stands for Full-time equivalent. An FTE of 1.0 means that the person is equivalent to a full-time worker, while an FTE of 0.5 signals that the worker is only half-time.
STEP 3: Select a FTE from the dropdown list.
- If you select "Separate" as the FTE Allocation you will be allowed to enter different allocations for each staff member such as 0.25, 0.5 0.75 etc.
- Alternatively, if you select Equal, the value you enter will be replicated across all staff in the project team. Hence, if you enter 1.0, all members allocated to the project will be working for the project on a full time basis.
- You can view the staff time allocation within the 'Project Budget' area.
 | Once the rollover process is in progress and if a particular project is being linked to both current and next period actions then the project board and team object will enable the user to select both responsible person of the two actions to be defined as 'Interplan responsible person'. |
 | In an instance where the Project Board and Team object is attached to more than one phase,
|
You can search for a particular team by their name, position and description, by simply typing his or her details in the text boxes at the top of the records and hit Enter.
Exporting the information in the object
You can export information in the object to formats such as PDF, Word, Excel etc. by following the steps below;
- To generate an export of the object, click on ‘Export’ icon on the toolbar.
- Upon clicking the ‘Export’ icon, you will see a preview of information within the object on a new browser tab.
Click on ‘Export dropdown menu’ icon and select the preferred export format from the menu to download the file in the selected format.

