Camms is pleased to bring you the Quarterly Product Release Note for Camms.Engage.
This quarter we've got a number of exciting new features and enhancements to improve your user experience within the system, which will be available in your Test environment on 11th June 2022 and will be available in your Live instance on 25th June 2022.
1. Automatically displaying all KPIs linked to the Hierarchy
2. Automatically displaying all Actions inked to the Hierarchy
3. Enhancing the Project Template to be compatible with Common Components
4. Enhancing the Risk Template to be compatible with Common Components
5. Introducing Rollup Action Linkages in the Action List component
1. Automatically displaying all KPIs linked to the Hierarchy |
This enhancement will automatically display KPIs directly linked to a hierarchy, that the Camms.Engage Dashboard is built on, without any manual intervention.
How do you configure this?
- A new option titled ‘KPI List/Node Component’ is added to the multi-select dropdown checkbox field labeled ‘Select the component(s) to display linked Projects, Risks, Actions and KPIs automatically’ in the Dashboard Configuration page.
- An administrator will be able to access this option from the Dashboard Configuration page.

Figure 1: Dashboard configuration section for KPI auto linkage
How does this work?
- When the ‘KPI List/Node Component’ checkbox is ticked, it will ensure that going forward, all KPIs that are linked to a hierarchy the Dashboard is based on, will be made visible and displayed automatically.
- An administrator will have the option to tick or untick this checkbox at any given time. However, unticking it will not revert the already visible KPIs.
Notes:
|
2. Automatically displaying all Actions inked to the Hierarchy |
This enhancement will automatically display Actions directly linked to a hierarchy, that the Camms.Engage Dashboard is built on, without any manual intervention.
How do you configure this?
- A new option titled ‘Action List/Node Component’ is added to the multi-select dropdown checkbox field labeled ‘Select the component(s) to display linked Projects, Risks, Actions and KPIs automatically’ in the Dashboard Configuration page.
- An administrator will be able to access this option from the Dashboard Configuration page.

Figure 2: Dashboard configuration section for action auto linkage
How does this work?
- When the ‘Action List/Node Component’ checkbox is ticked, it will ensure that going forward, all Actions that are linked to a hierarchy, that the Dashboard is based on, will be made visible and displayed automatically.
- An administrator will have the option to tick or untick this checkbox at any given time. However, unticking will not revert the already visible actions.
Note: This checkbox will not impact the actions that are already linked to a hierarchy. Only Actions that are linked subsequent to activating this setting, will be automatically linked. |
3. Enhancing the Project Template to be compatible with Common Components |
This enhancement will let you apply detail level common component configurations of the selected template, to all Projects within the Camms.Engage Dashboard.
How do you configure this?
- Once the ‘Template Project’ functionality is activated from the Dashboard Creation/Edit page, the option of choosing a Template Project will be provided in all Project List/Node components.

Figure 3.1: Activation of template functionality for projects
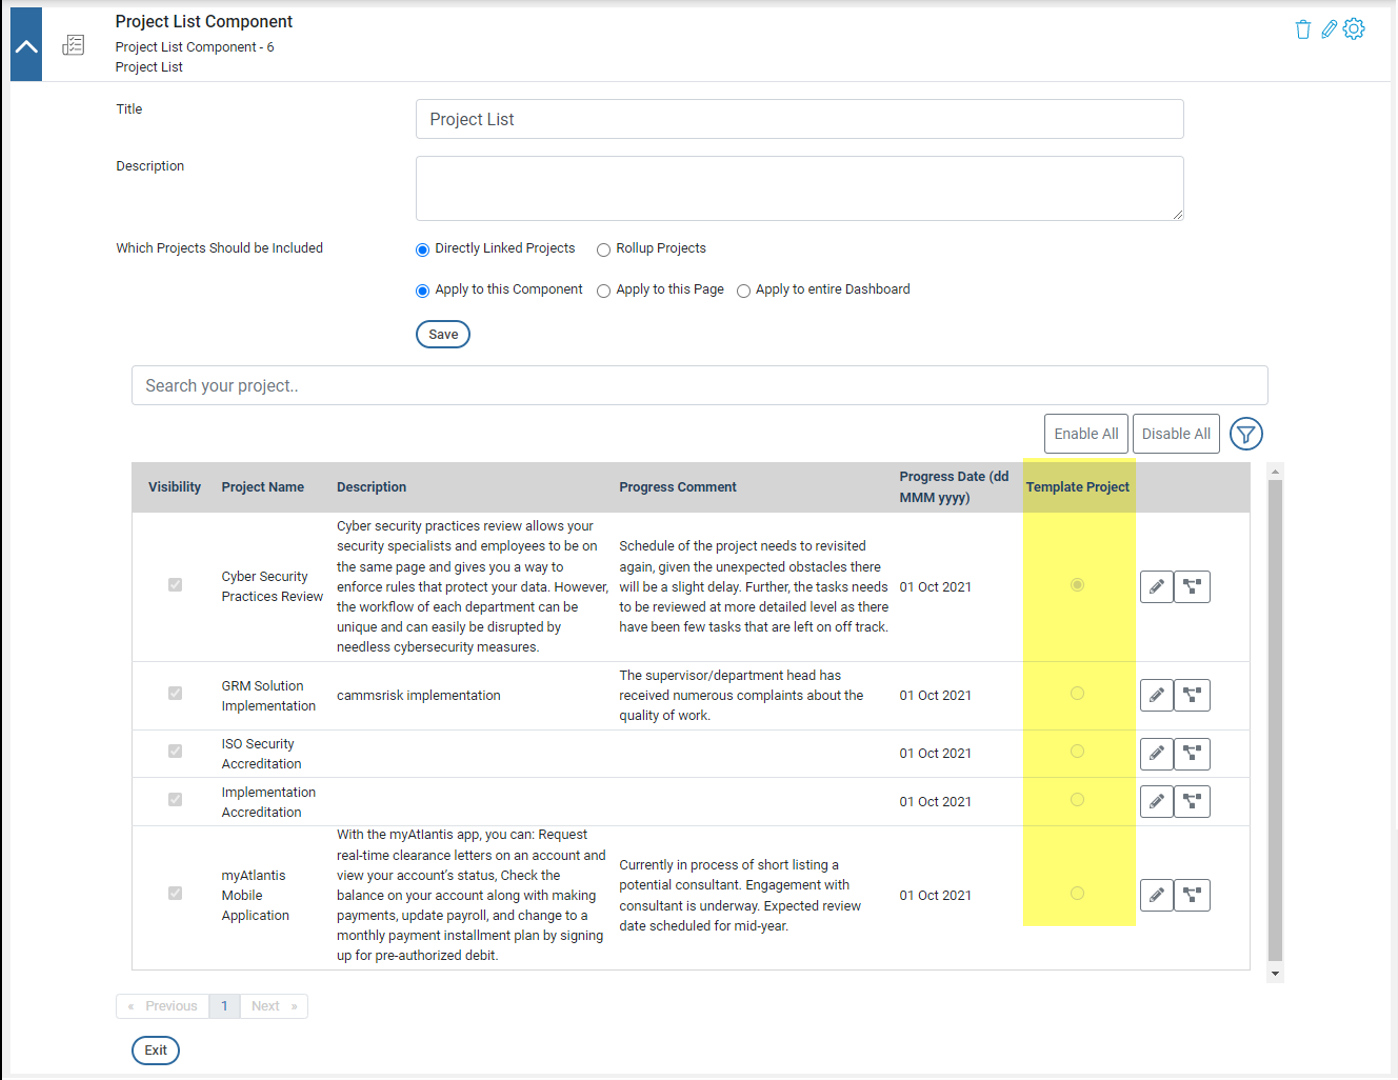
Figure 3.2: Selection of a template project
- Once a Project is selected as a template, a validation message will be displayed in a popup window. Apart from the standard template functionality, the validation message will now have a new option.
- This new option will let you make a selection to apply the template functionality for all detailed level common components that are placed and configured against the selected project.

Figure 3.3: Selection of the common component template functionality
How does this work?
The following actions will take place upon confirmation:
- Any detail level common component available within the template project, will be copied over to the projects that will be made visible automatically or manually.
Example: If the ‘Image Gallery’ component is configured for the template project, going forward, all projects that will be linked to a hierarchy and enabled within Camms.Engage via the Project List or Project Node, will inherit the same ‘Image Gallery’ component and its configurations, without any user intervention.
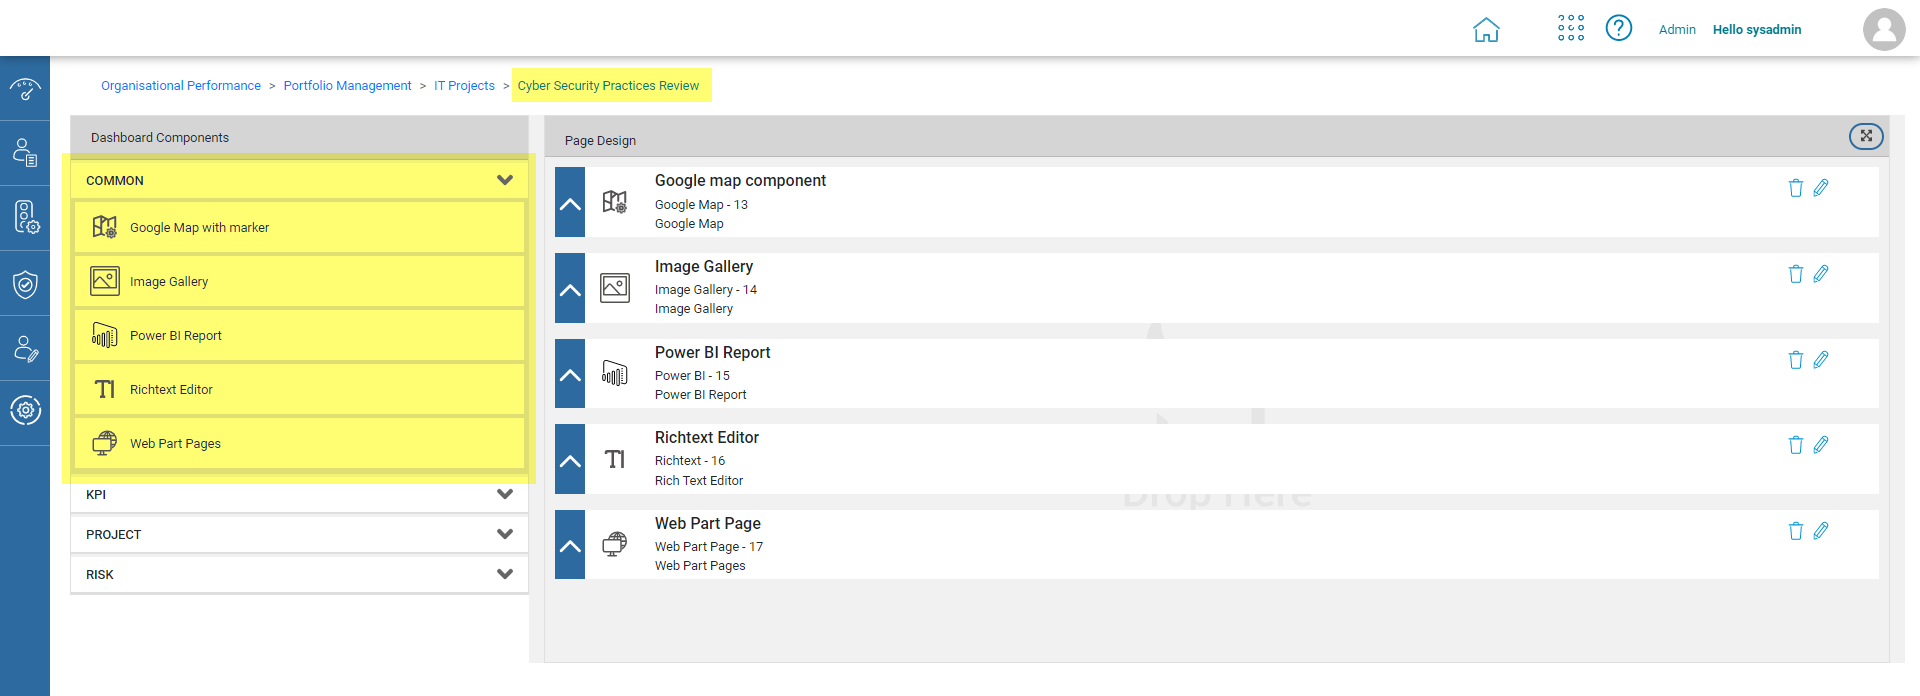
Figure 3.4: Detailed level common components of a project
- This will not be applied to projects that are made visible prior to selecting a template project.
Notes:
|
4. Enhancing the Risk Template to be compatible with Common Components |
This enhancement will let you apply detail level common component configurations of the selected template, to all Risks within the Camms.Engage Dashboard.
How do you configure this?
- Once the ‘Template Risk’ functionality is activated from the Dashboard Creation/Edit page, the option of choosing a Template Risk will be provided in all Risk List/Node components.
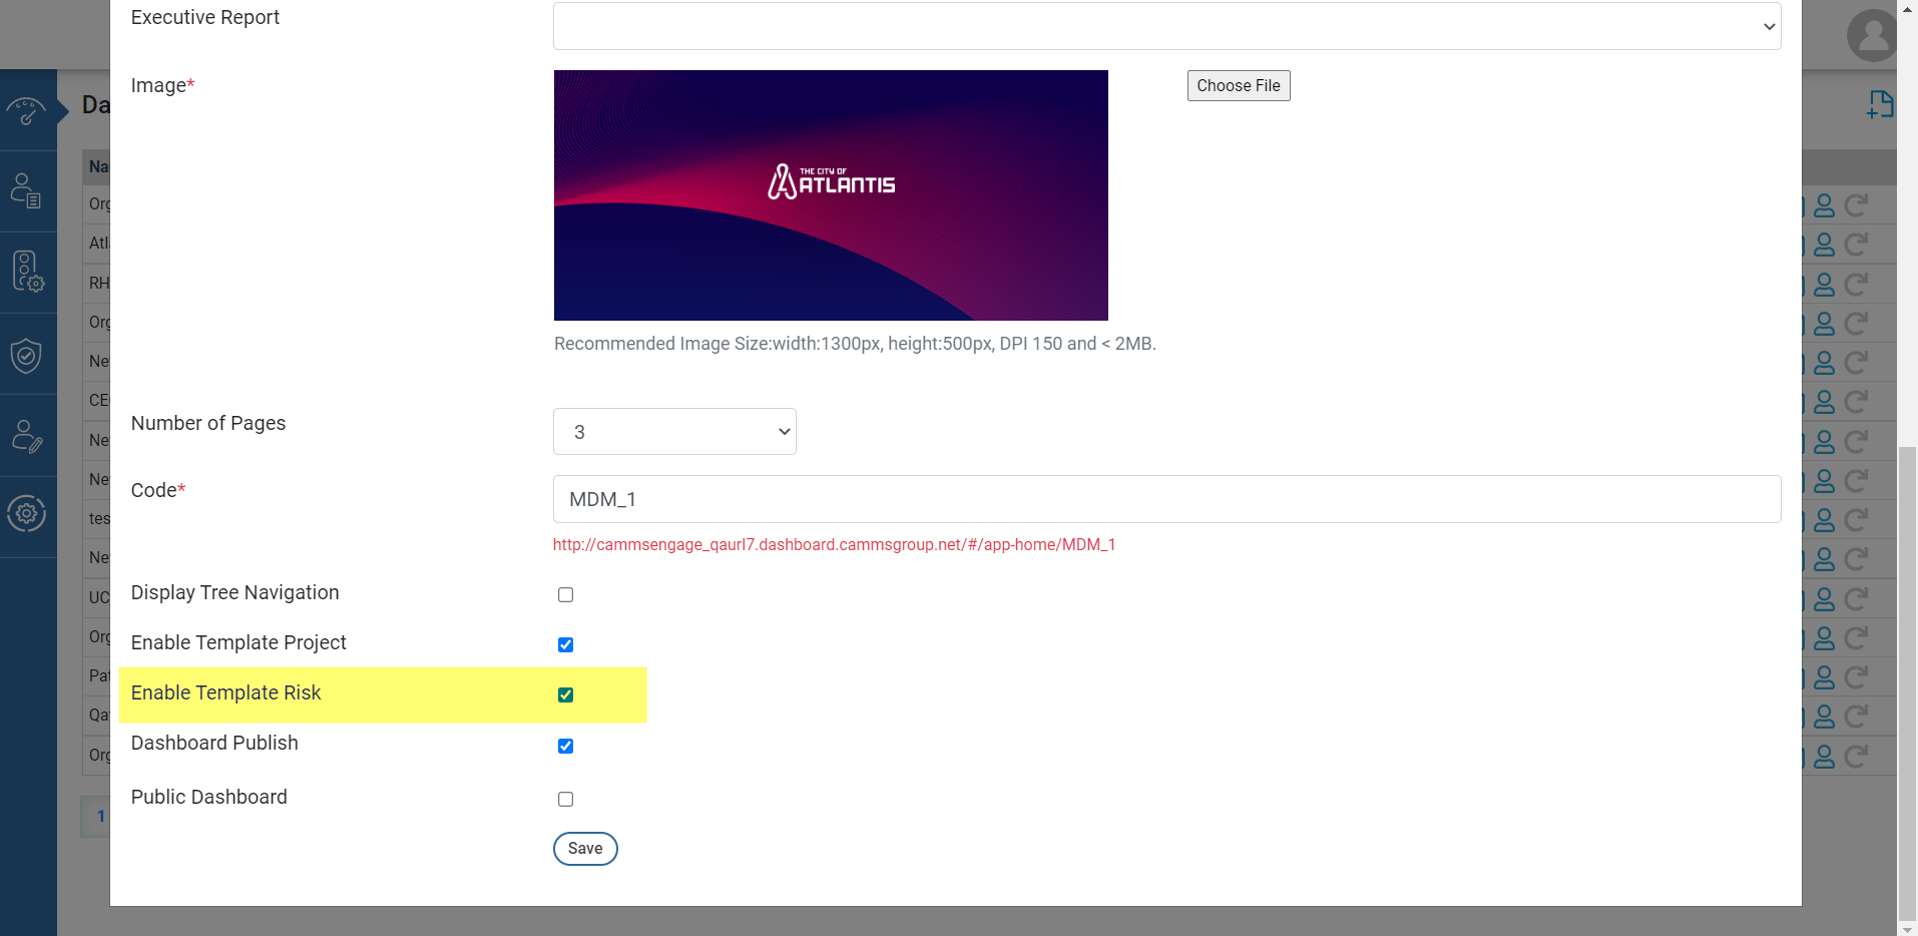
Figure 4.1: Activation of template functionality for risks
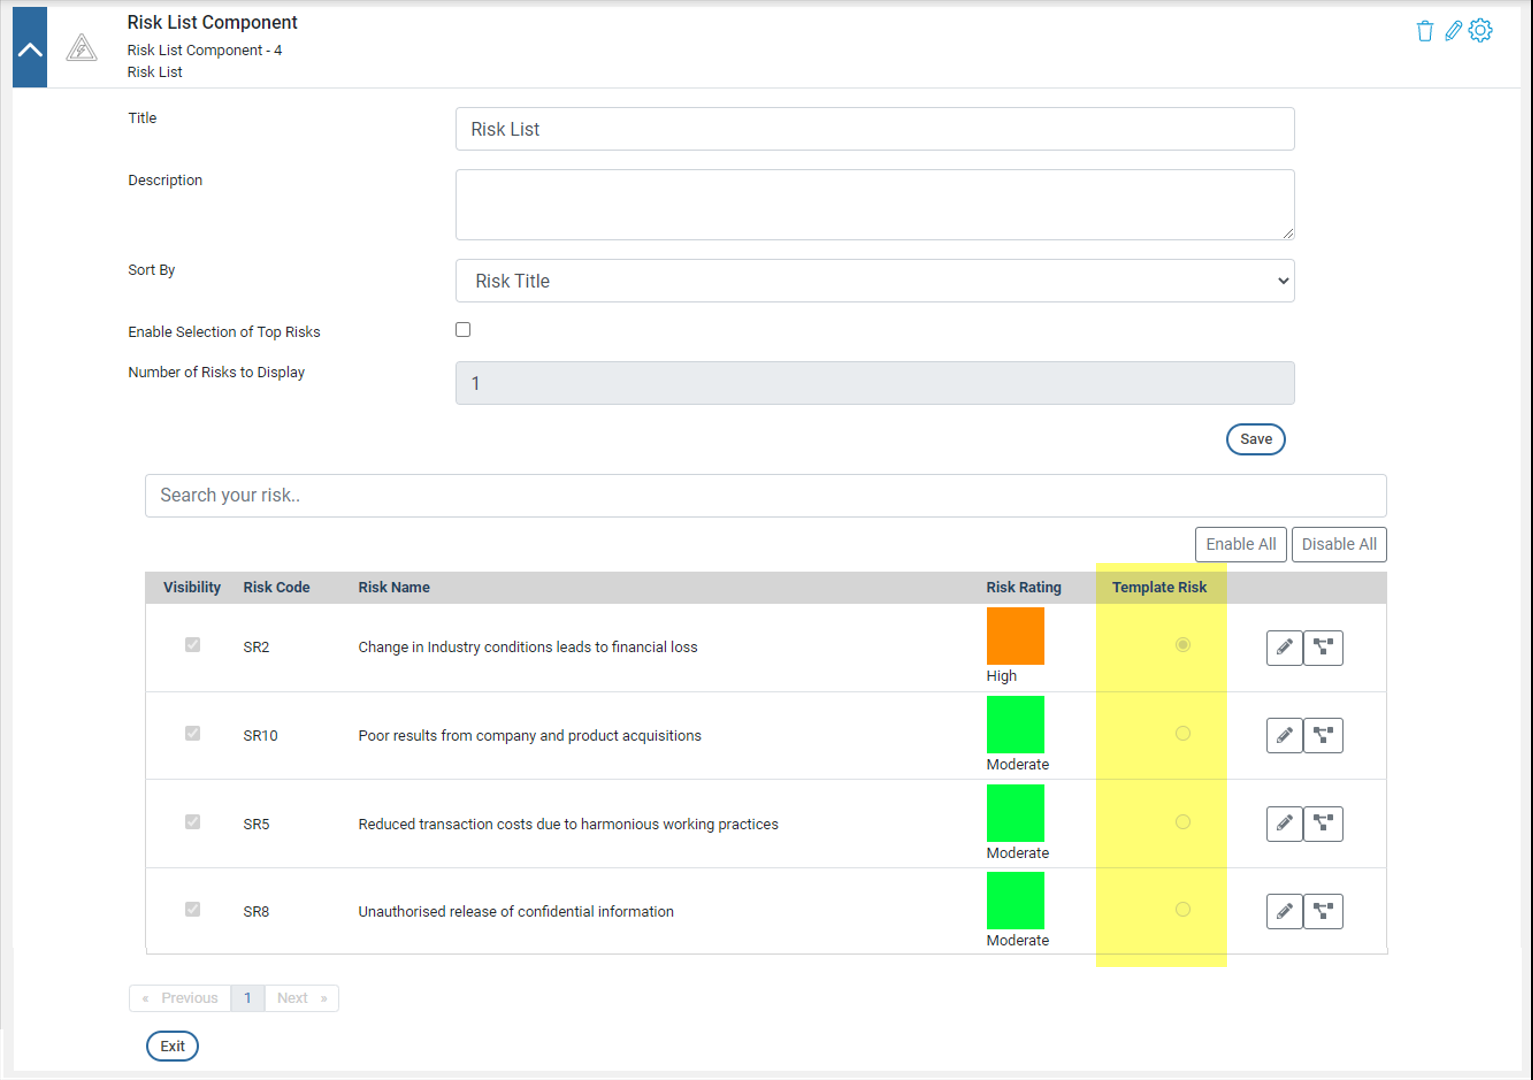
Figure 4.2: Selection of a template risk
- Once a Risk is selected as a template, a validation message will be displayed in a popup window. Apart from the standard template functionality, the validation message will now have a new option.
- This new option will let you make a selection to apply the template functionality for all detailed level common components that have been placed and configured against the selected risk.
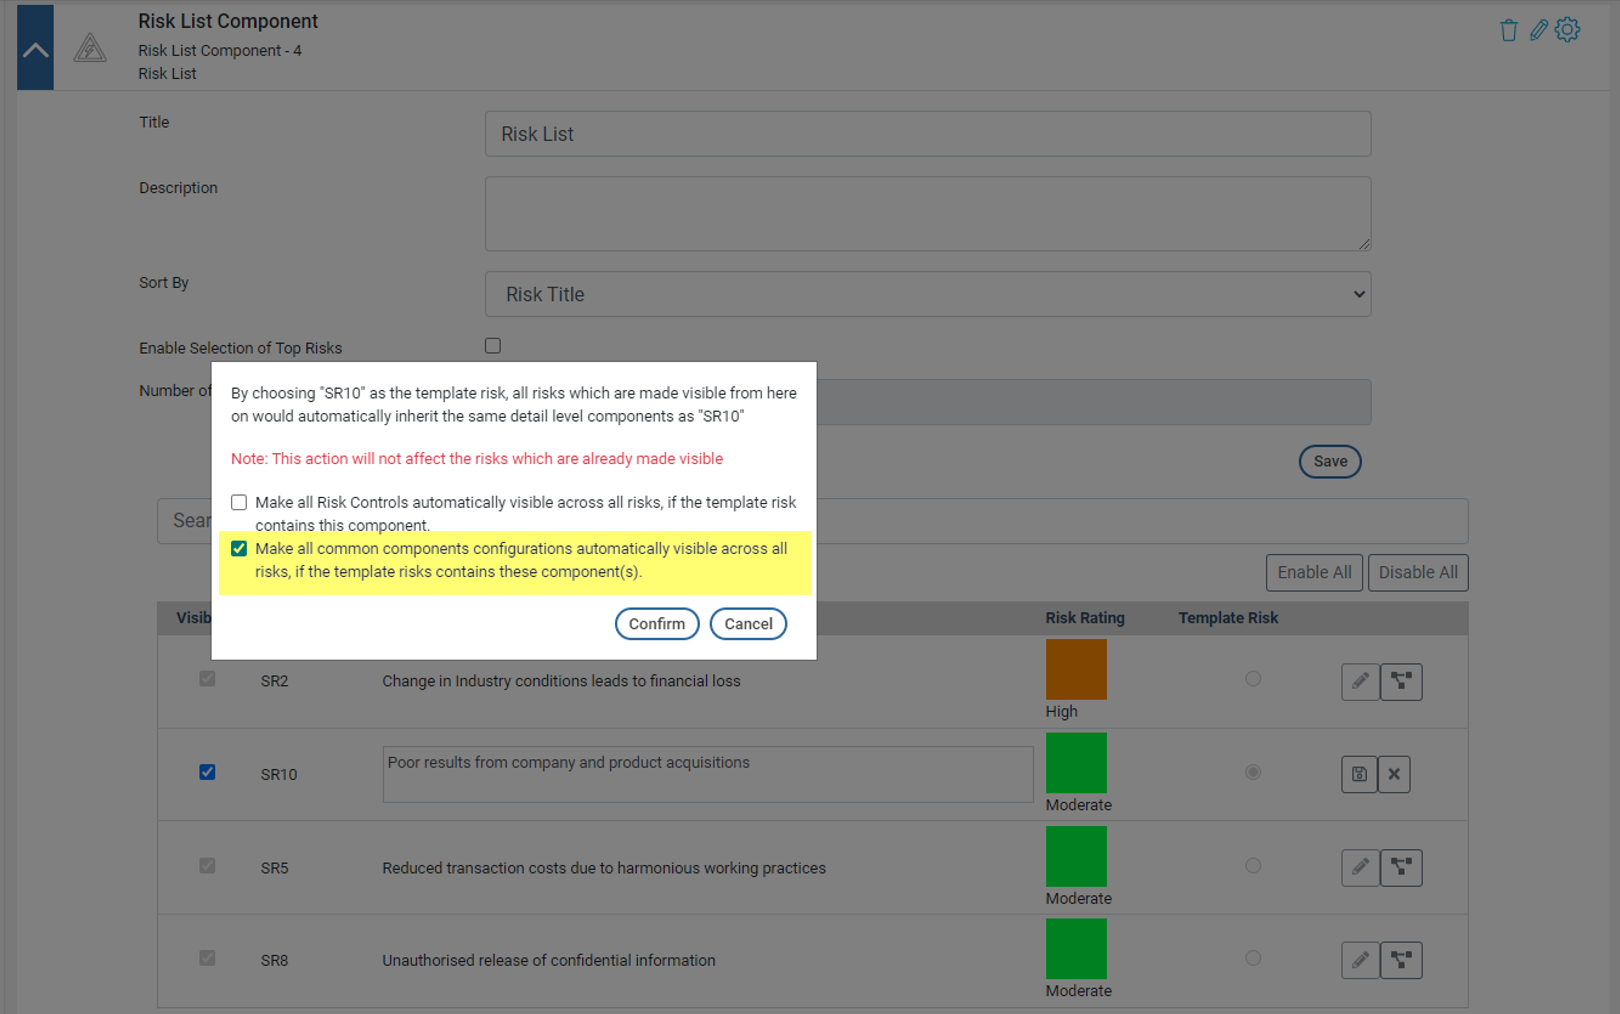
Figure 4.3: Selection of the common component template functionality
How does this work?
The following actions will take place upon confirmation:
- Any detail level common component available within the Template Risk, will be copied over to the risks that will be made visible automatically or manually.
Example: If the ‘Rich Text Editor’ component is configured for the Template Risk, going forward, all risks that will be linked to a hierarchy and enabled within Camms.Engage via the Risk List or Risk Node, will inherit the same ‘Rich Text Editor’ component and its configurations without any user intervention.

Figure 4.4: Detailed level common components of a risk
- This will not be applied to the risks that are made visible prior to selecting a Template Risk.
Notes:
|
5. Introducing Rollup Action Linkages in the Action List component |
This enhancement will let you showcase values for Rollup Action linkages under the Action List component. This can be configured by an administrator and then be displayed to users.
How do you configure this?
- In the Dashboard Admin panel, a new list field will be available under the Configuration Menu, titled ‘Rollup Action Linkages’.
- An administrator can tick the 'visibility' checkbox and configure the label name to capture the field into the Dashboard.

Figure 5.1: Rollup action linkages field within the action list component in admin panel
How does this work?
- If the visibility checkbox is ticked, and ‘Rollup Actions’ are activated from the ‘Edit’ menu of the Action List component, the ‘Rollup Action Linkages' values will be captured into the Dashboard.
Example: If hierarchy node A has three child levels X, Y and Z, with linked Actions, and if an Action List is placed against node A, these actions linked to child levels will be identified as Rollup Actions. Therefore, this modification will show you the original linked hierarchy node(s) of these Actions.
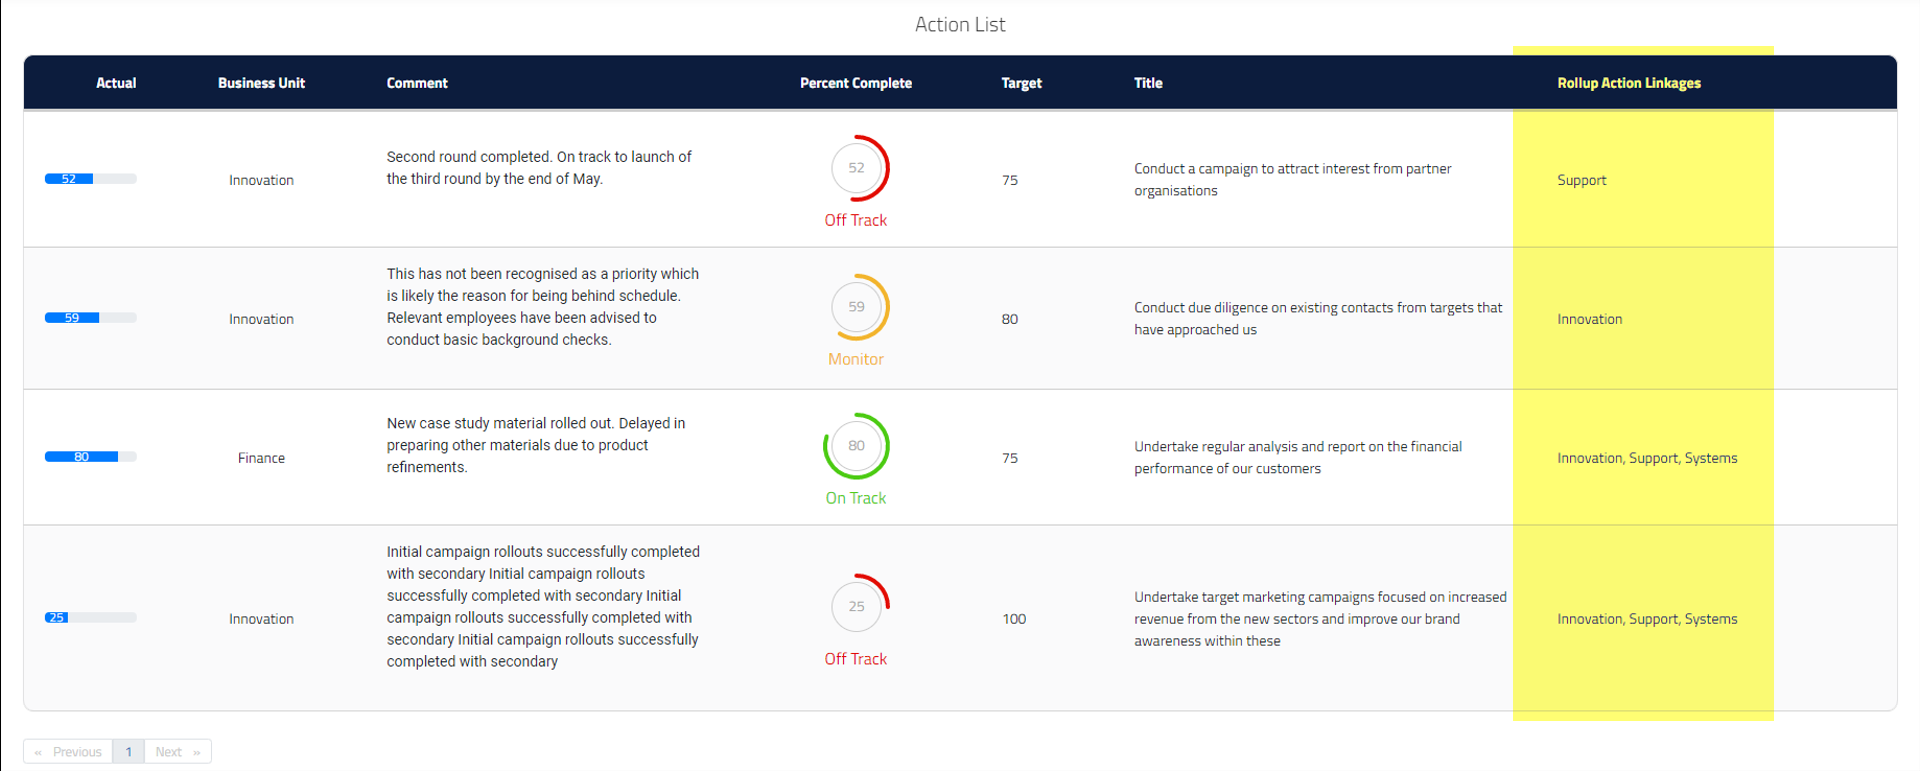
Figure 5.2: Rollup action linkages field within the action list component of the dashboard
- If the visibility checkbox is unticked, the 'Rollup Action Linkages' field will not be captured into the Dashboard.
Notes:
|