Camms is pleased to bring you the Quarterly Product Release Note for Camms.Project.
This quarter we've got a number of exciting new features and enhancements to improve your user experience within the system, which will be available in your Test environment on 11th March 2023 and will be available in your Live instance on 25th March 2023.
1. Undo/Redo changes in the Gantt chart
2. Importing a project plan created via Microsoft Project to Camms.Project
3. Copy-pasting tasks in the Gantt chart
1. Undo/Redo changes in the Gantt chart |
With this release, the Undo/Redo feature will be introduced to the Gantt chart by allow user to undo or redo values which you have entered or an action which you performed.
Users will be able to undo or redo the changes up until the time which the last manual save was done.
Note: Users only can undo or redo their previous actions,
The memory of both Undo and Redo buttons will be cleared when you leave the Task Planning object without manually saving the changes made into the system. Also, you can only undo or redo your previous actions only system hasn't been refreshed. |
How does this work?
You can undo or redo your changes done in the Gantt chart such as adding a new task, updating properties of tasks, deleting tasks etc., by clicking on the Undo and Redo buttons available respectively on the top toolbar of the Task Planning object.
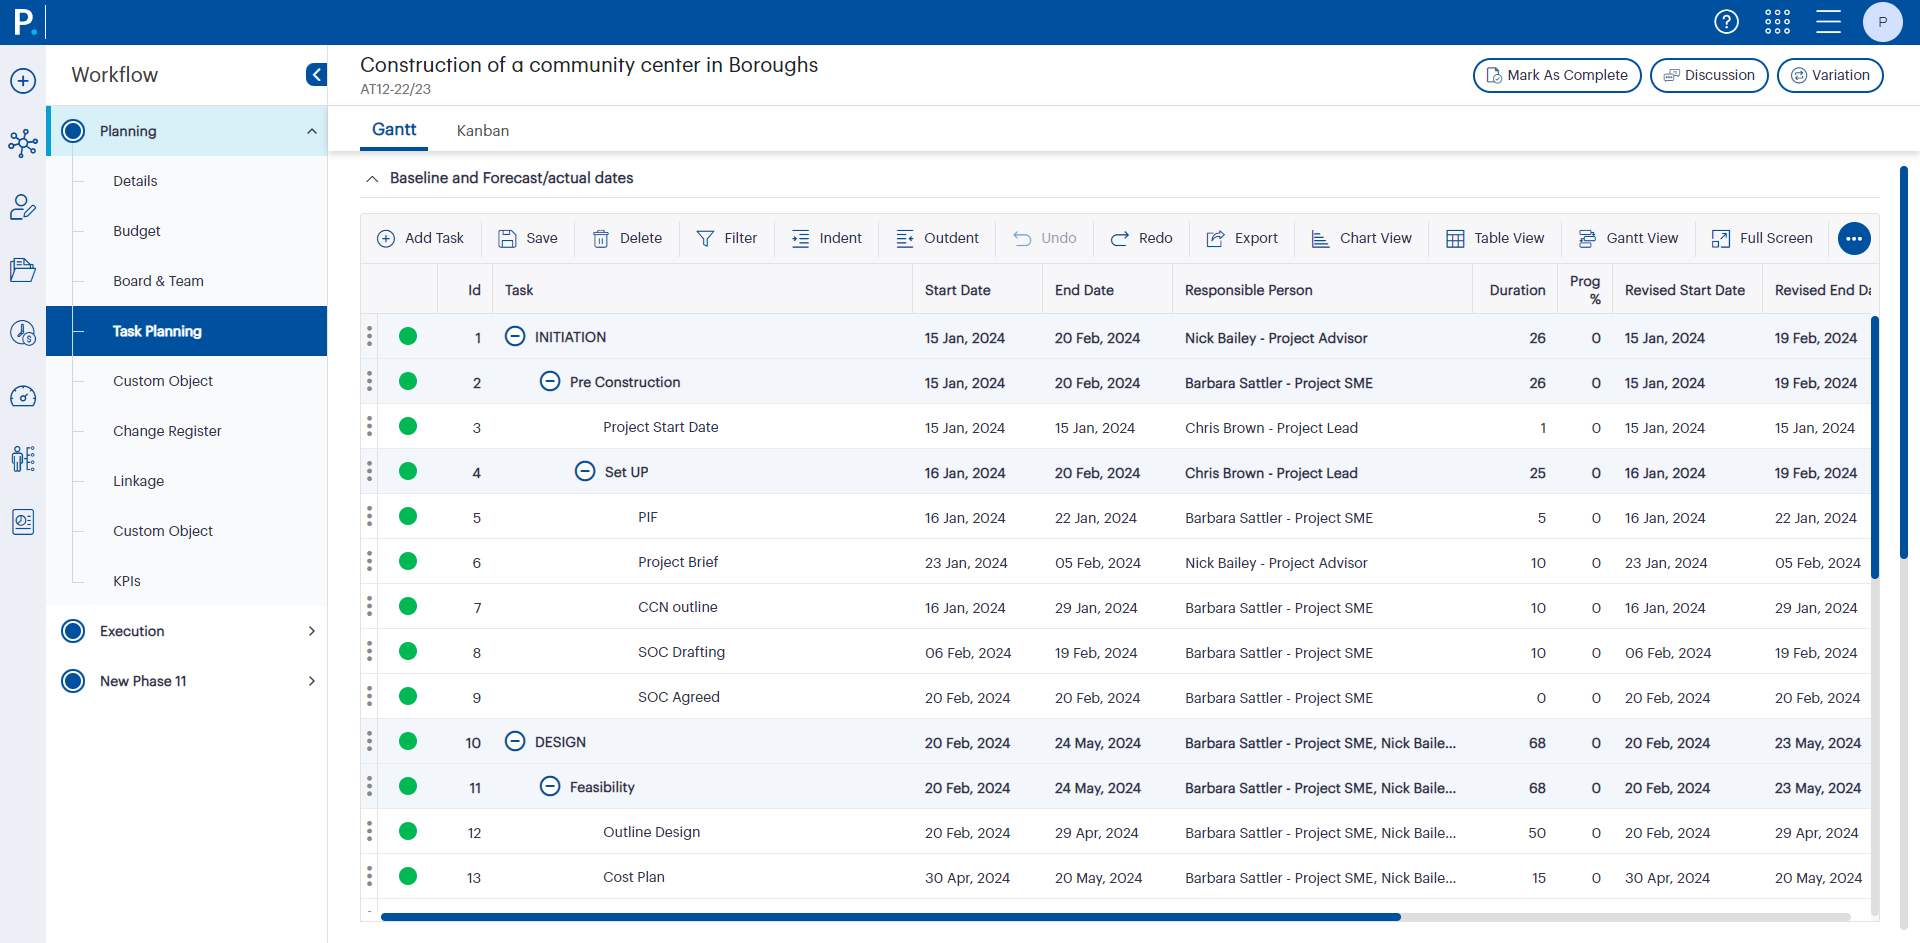
For example, assume that your project has the task plan below, and that you have accidentally deleted a task titled as 'Project Brief' which is crucial for your plan.
The Undo button will be activated if any change was done to the Task Planning object up until the moment which you have last saved your changes.
In order to undo the task deletion, click on the Undo button available on the top toolbar of the Task Planning object. Then the change will be undone.

You can redo the change which was undone by clicking on the Redo button which will be available for you after you clicked on the Undo button.
Note: The Undo/Redo feature will only be applicable for the following changes you make on the Gantt chart.
The Undo/Redo feature will not be applicable for the following actions taken via the options available in top toolbar.
|
What does it mean if the Undo and Redo buttons are greyed out?
The Undo and Redo buttons will be disabled by default, and they will only be enabled when there are changes to be undone or redone. Hence, If both buttons are grayed out, that means there are no actions available to undo or redo.
2. Importing a project plan created via Microsoft Project to Camms.Project |
With this update, you will now be able to import project plans that you have created via Microsoft Project onto Camms.Project, without having to install the MS Project Add-on.
How can I activate this feature?
This feature can be activated by the administrator by switching on the setting "Allow users to upload data from a MS Project file onto the Task Planning object" via Project Settings > System Settings page.
How to import an MS Project file onto the application?
You can follow the below steps to import an MS Project file onto the Task Planning object.
- STEP 1: Create your task plan within Microsoft Project and save the file.
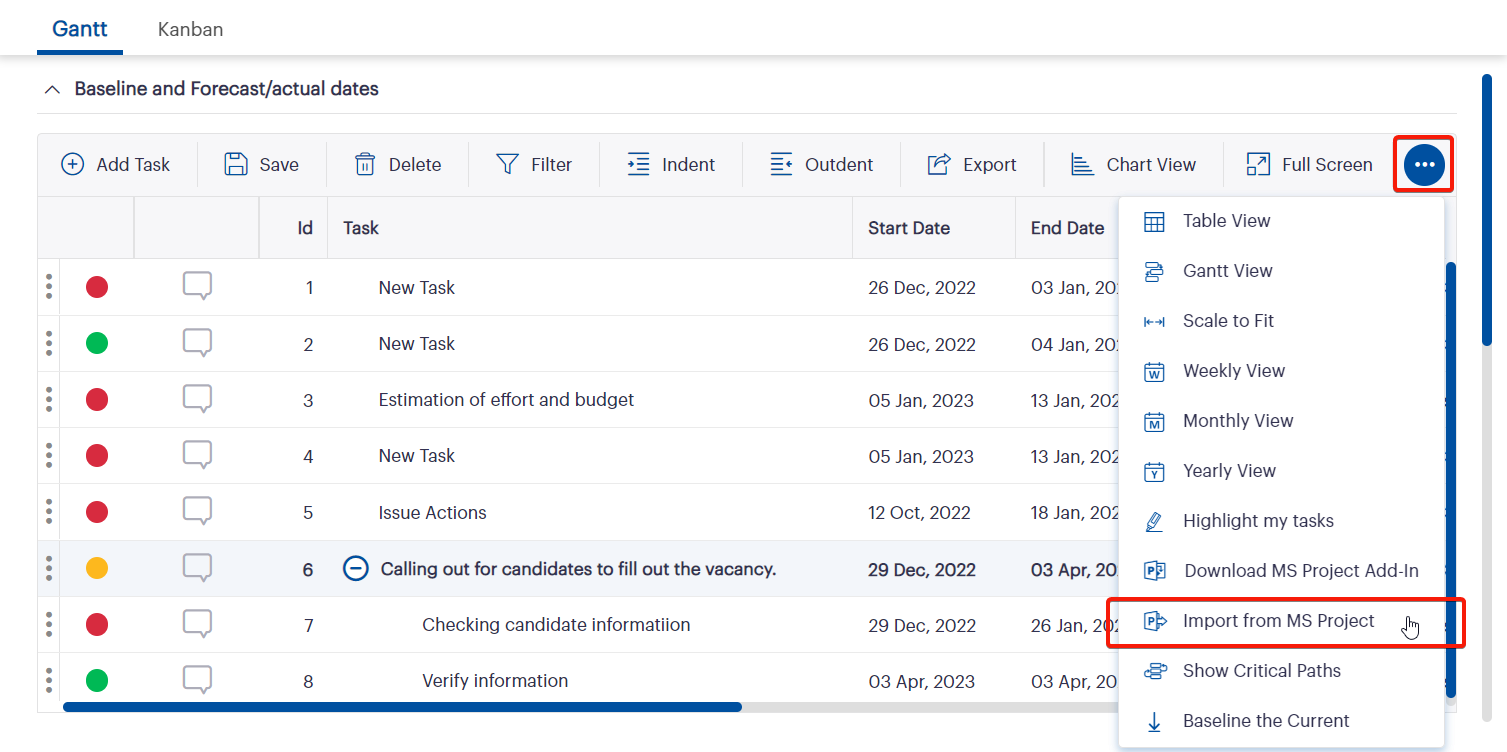
Note: Currently, we only support the following standard fields: Task Title, Percent Complete, Resource Names, Start Date, End Date, Duration, Predecessors. - STEP 2: Click the Import from MS Project option available in the Task Planning object.
Note: If there is data already available in the Task Planning object, it will be overwritten with the data in the newly uploaded MS Project file. |
- STEP 3: Click the Select button in the popup window and select the MS Project file that you created and saved your project details to be uploaded.
- STEP 4: Once the file is selected, click the Upload button to import the file in to Camms.Project.
 Figure 2.2: The File Upload step
- STEP 5: Click the Next button at the bottom of the popup window to take you to the final step.
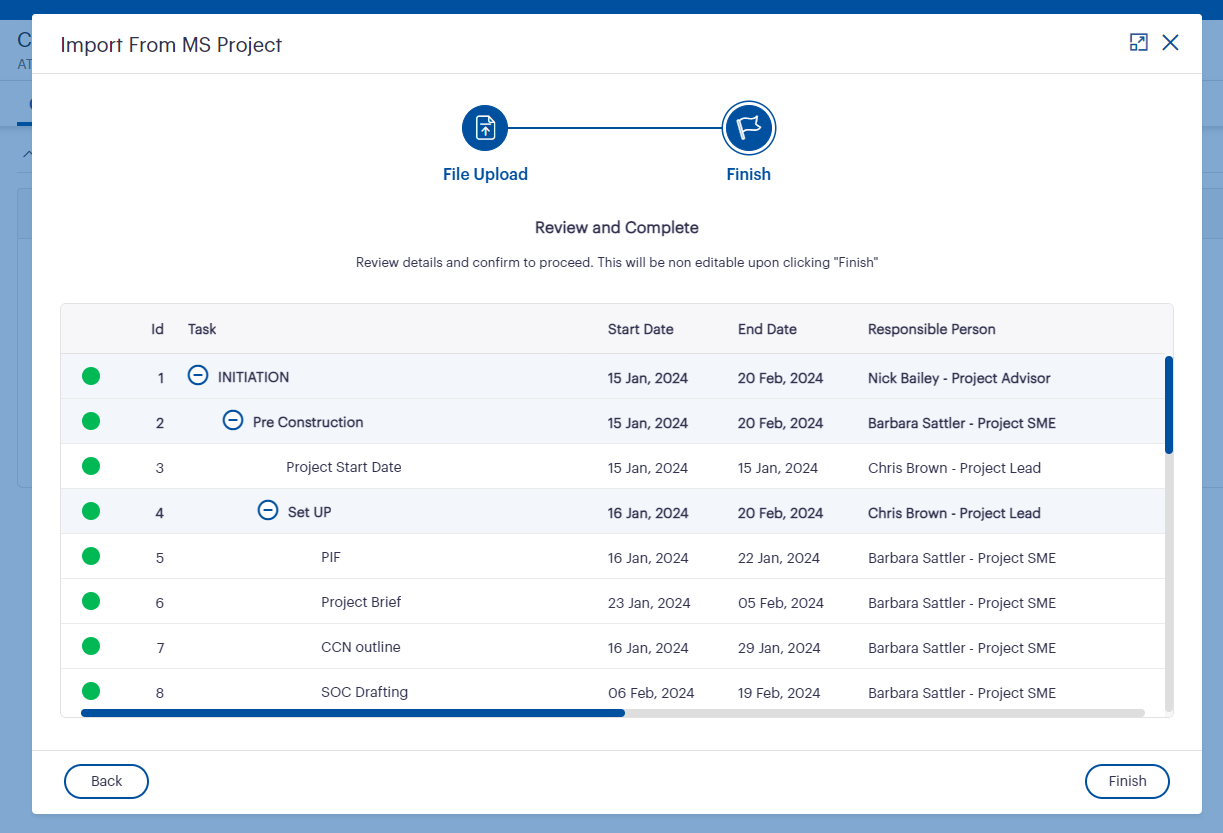
Figure 2.3: The Preview step
- STEP 6: Check the preview to ensure it contains the data which you uploaded, and see if there are any data related errors shown within the error log. If any errors exist, click the Back button and fix the errors in your MS Project file and upload the file again.
 Figure 2.4: Final preview with errors in the data
- STEP 7: Once the uploaded data is verified and error-free, click the Finish button to complete the data upload/import into the Gantt chart.
Note: We will allow you to proceed if there are errors that can be fixed by the system itself (e.g. if the name of a task is empty, it will be corrected automatically by the system to 'New Task'). However, an error message will be displayed for this empty task name. |

The below table depicts the type of error messages that may be displayed, the reason for the error, and how it can be fixed.
| Error message | What’s the reason for this error? | How do I fix the error? |
|---|---|---|
Task <<Task ID>> - <<Task Title>> at row “Y” is outside the project timeframe. | If the start date and/or end date of the task is outside the project timeframe. | Edit the data accordingly and re-upload the file. |
Invalid format entered for predecessor in task <<Task ID>> - <<Task Title>>. Allowed format is ‘Task ID’'Type of predecessor'+/-'No. of days of lead/lag time' . | If the format entered for the predecessor field is incorrect. For example, if the user enters a predecessor ID of ‘3' that has a lag time of 5 days, then the predecessor format should be: 3+5d or 3+5. | Edit the data accordingly and re-upload the file. |
The Task Name of the task <<Task ID>> - <<Task Name>> should not be empty. | If the Task Name of a task is empty. | Edit the data accordingly and re-upload the file. |
Cannot assign the task <<Task ID>> - <<Task Name>> to <<Staff assigned>>. The <<Staff assigned>> is not available in the current board and team of your project. | If one or multiple responsible person(s) assigned to a task are not available in the current board and team object. | Add the staff members to the Board and Team object and then try to re-upload the file. |
Task <<Task ID>> - <<Task Name>> does not have a responsible person assigned to it. | If the setting 'Allow tasks to be created without a responsible person assigned to them' is switched off, and there is no responsible person assigned to the mentioned task. | Edit the data accordingly and re-upload the file. |
Unable to delete task <<Task ID>> - <<Task Title>> since it is linked to Time Entry. | The task that was deleted is linked to a time entry record that is either approved, rejected or in pending approval stage. | Delete the time entry records related to the task or add the task in the file. |
An in-app Contextual Learning video is now available for this feature for public cloud customers.
Contact cammscollege@cammsgroup.com for further information.
3. Copy-pasting tasks in the Gantt chart |
This feature will let you copy and paste tasks within the Gantt, so that it is easier for you to create comprehensive task plans without having to create new tasks.
How does this work?
Copying and pasting a standalone task
You can copy a standalone task by following the steps below;
- STEP 1: Right-click on the task that you wish to copy
- STEP 2: Select the Copy task option from the menu that appears.
 Figure 3.1: 'Copy Task' option on the menu
You can paste the copied task by following the steps below;
- STEP 1: Right-click on the task below which you wish to paste the copied task.
- STEP 2: If you wish to paste the copied task as a standalone task, then select the Paste as standalone task option from the menu that appears. Similarly, if you wish to paste the copied task as a child task underneath the task you right-clicked on, then select the Paste as a child task option from the menu that appears.
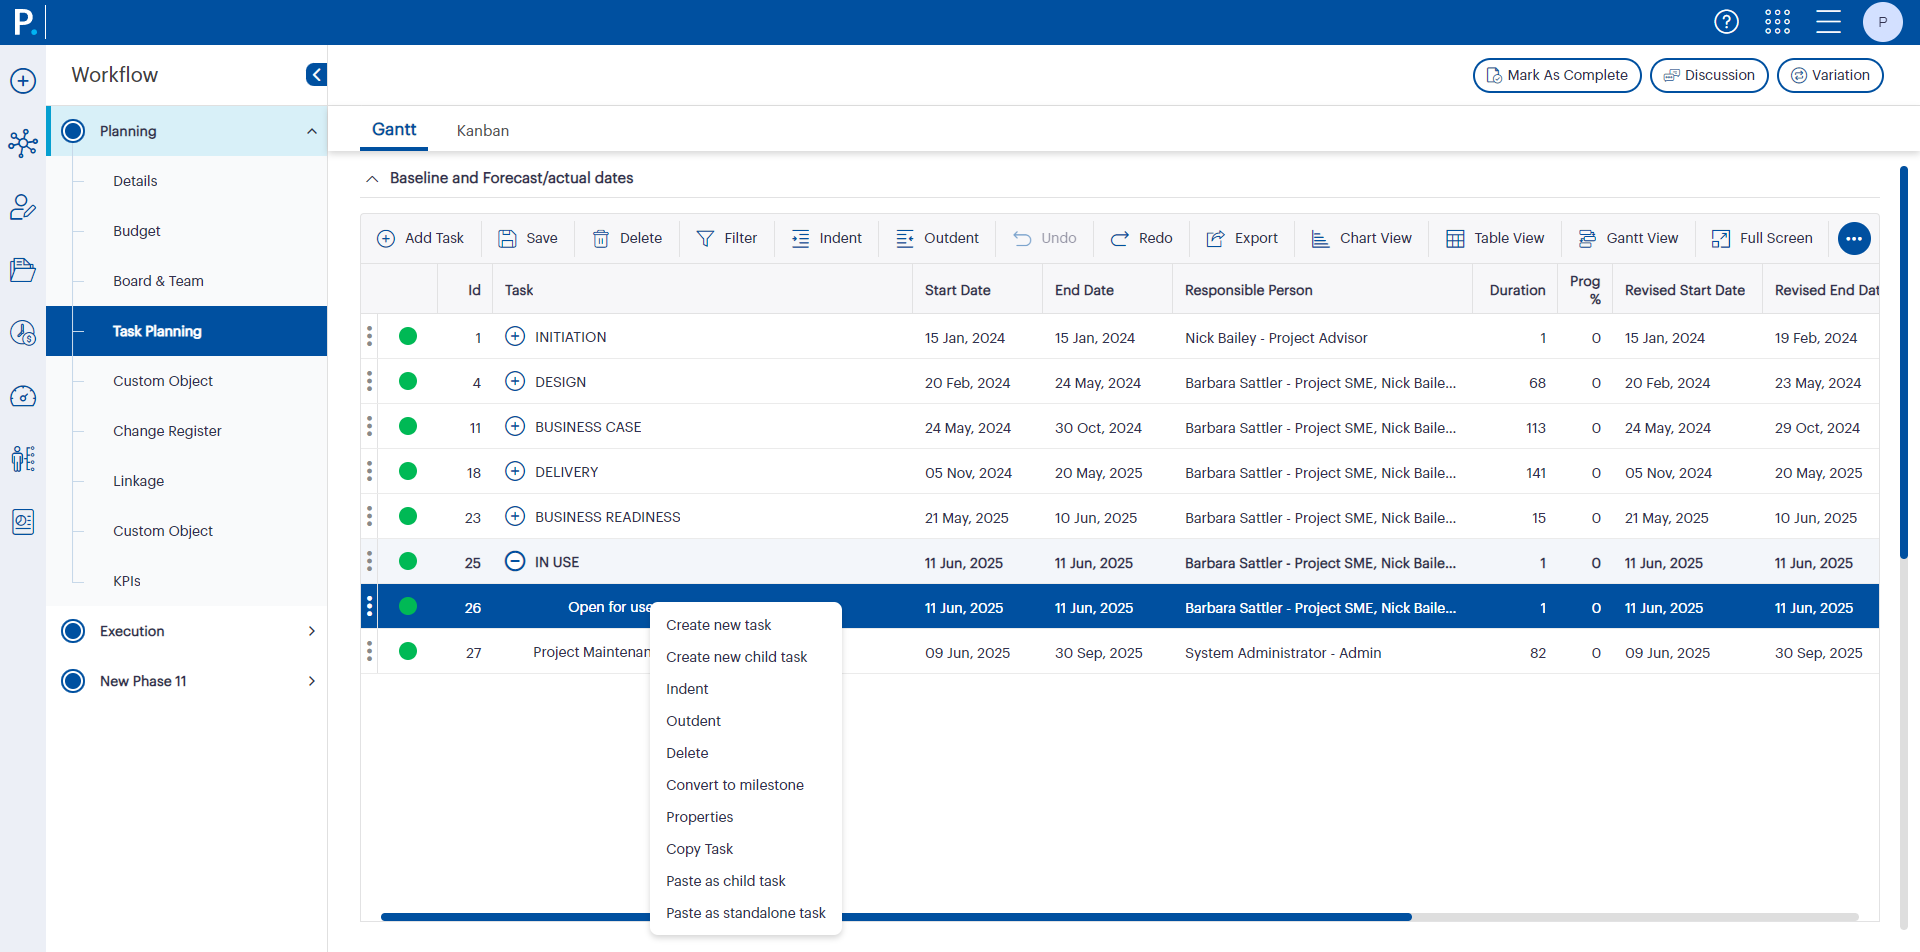
Figure 3.2: 'Paste as child task' and 'Paste as standalone task' options on the menu
Copying and pasting a parent task including its child tasks
You can copy a parent task including the child tasks underneath it by following the steps below;
- STEP 1: Right-click on the task that you wish to copy
- STEP 2: Select the Copy task including all child tasks option from the menu that appears.
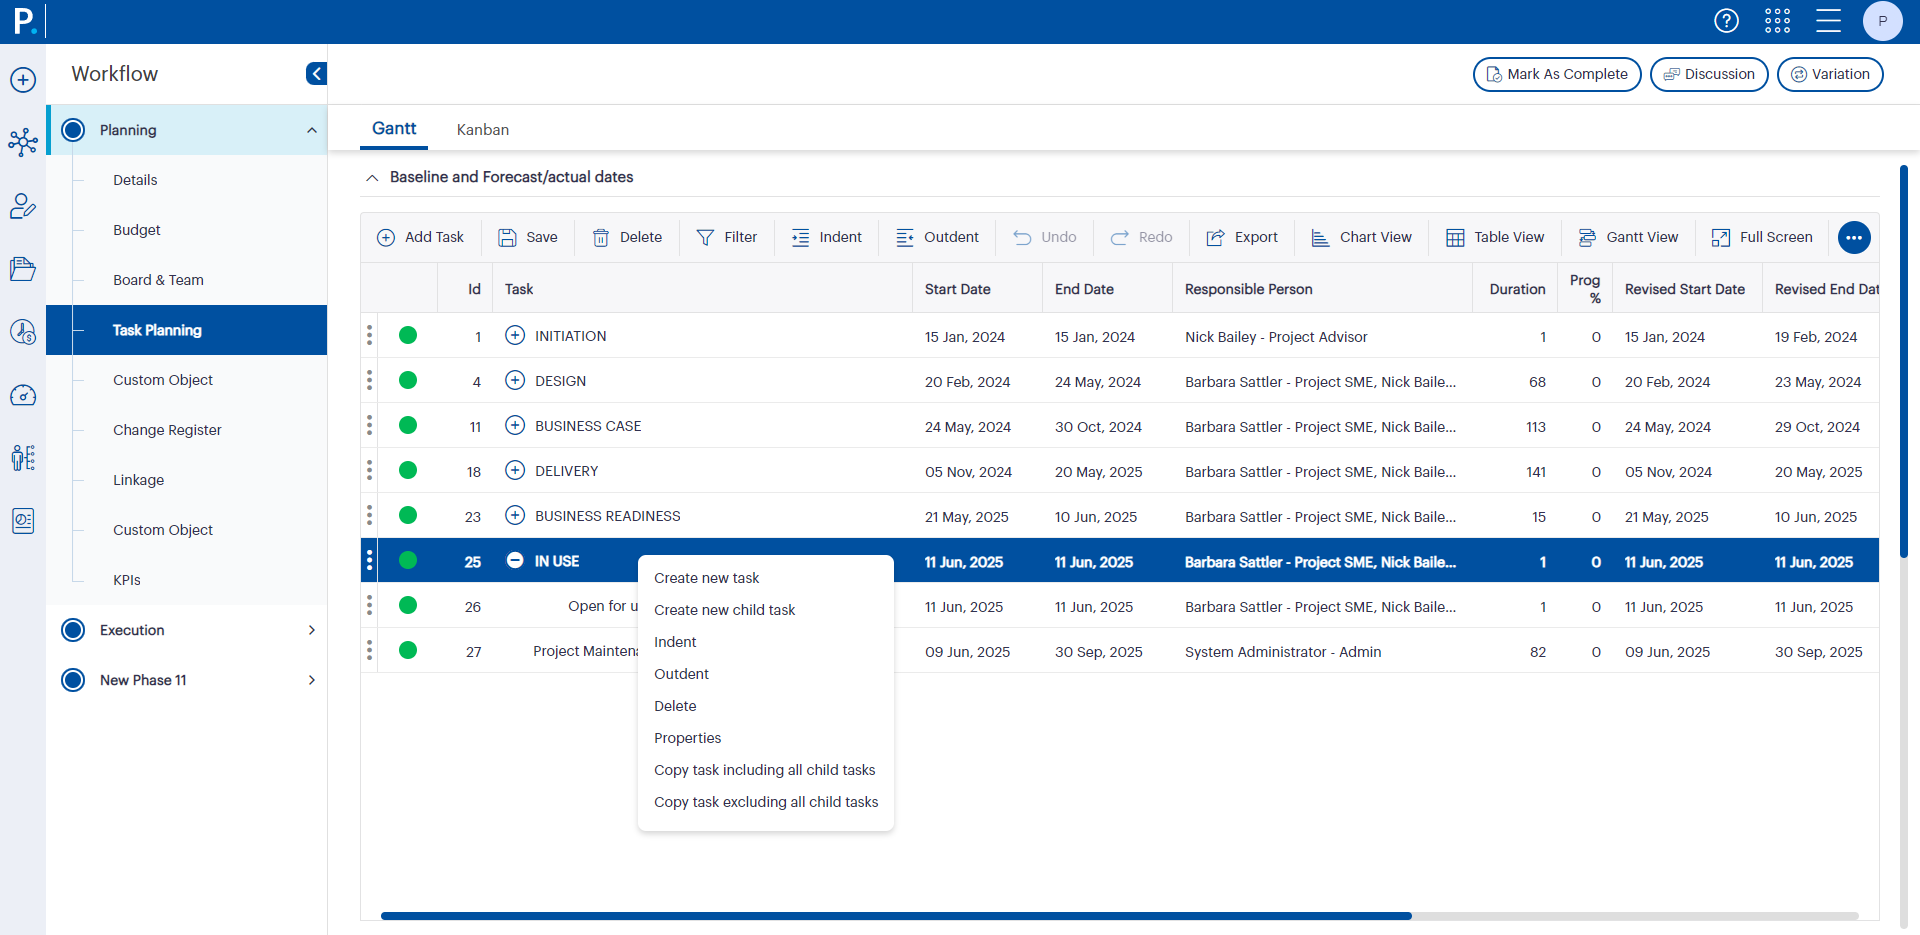
Figure 3.3: 'Copy task including all child tasks' option on the menu
You can paste the copied task(s) by following the steps below;
- STEP 1: Right-click on the task below which you wish to paste the copied task.
- STEP 2: If you wish to paste the copied task as a standalone task, then select the Paste as standalone task option from the menu that appears. Similarly, if you wish to paste the copied task as a child task underneath the task you right-clicked on, then select the Paste as a child task option from the menu that appears.
Figure 3.4: 'Paste as child task' and 'Paste as standalone task' options on the menu
Copying and pasting a parent task excluding its child tasks
You can copy only the parent task excluding all the child tasks underneath it by following the steps below;
- STEP 1: Right-click on the task that you wish to copy
- STEP 2: Select the Copy task excluding all child tasks option from the menu that appears.

Figure 3.5: 'Copy task excluding all child tasks' option on the menu
You can paste the copied task(s) by following the steps below;
- STEP 1: Right-click on the task below which you wish to paste the copied task.
- STEP 2: If you wish to paste the copied task as a standalone task, then select the Paste as standalone task option from the menu that appears. Similarly, if you wish to paste the copied task as a child task underneath the task you right-clicked on, then select the Paste as a child task option from the menu that appears.
Figure 3.6: 'Paste as child task' and 'Paste as standalone task' options on the menu