Business Requirement within Project management facilitates the consolidation of requirements in a central repository.
This would only be available for organisations who have purchased Camms Business Requirement Module.

The search box on top will enable you to conveniently locate a requirement from a list. You can click on a requirement if you wish the change the details. See below screenshot.

After amending the details, links and deciding the prioritisation (this will be explained further individually on the next topics), simply click on the save button located on the top right corner. You need to click and save the changes prior to shifting to another page.

Requirement Register
 This will provide a view of all the requirements to the users (with necessary permission levels).
You can click on a requirement to change the details. Using the ‘Add new’ icon which is located on the top right corner of the screen, you can add new requirements to this list. However, this is only visible for the users who have necessary permission levels. Once you click on the ‘Add new’ icon, you will see the details page which includes the fields configured by the Administrator. As soon as you save the record, you will see further two tabs with titles ‘Links’ and ‘Prioritisation’. These two tabs are explained separately.
You can use the search box which is located on the top in order to conveniently locate a field. However, this will only show the fields which were configured as ‘include in search’ through the administration area.
If you wish to export the fields appearing in the requirement register area to Excel, click on the excel icon which is located on the top.
Details – Creating Requirements
When you click on the ‘Add new’ icon on the top right corner of Business requirements screen, a new screen will appear as shown below. Here the user will be able to create new requirements.
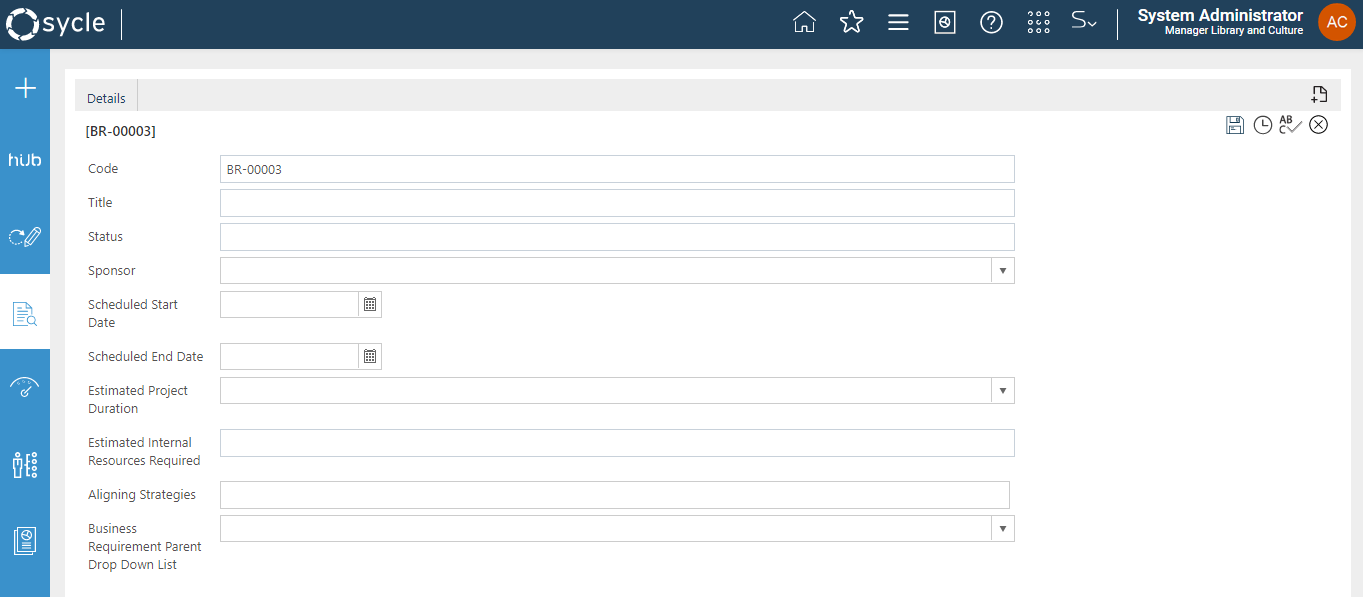
Only the users who have necessary permissions can access this page and the fields for a new requirement will appear depending on the configurations done in the settings (field configurations).
The top right corner will give you options such as 'save', 'spell check', 'History' and 'Delete'.
Editing Requirements
When you click on a requirement from the register, you will be directed to the below shown page which will allow you to edit an existing requirement.

This screen can be viewed and edited by user's with necessary permissions.
The 'History’ icon which is located on the top right corner will enable you to obtain an audit on the changes done which will indicate all the changes made including the user name and the date/time stamp.
Links
The Link tab in each business requirement will enable you to link Projects, actions and risks to the specific business requirement.
You can navigate to Linkage pages by selecting the relevant category of linkage (Projects/Actions/Risks) from the Links dropdown menu.
Any Linkage page mainly consist of two sections.
- The first part of the page displays the records which are currently linked to the business requirement. you can delete/remove the linkage using the 'Delete' Icon.
- Meanwhile, the second part of the page allows the user to search for an existing record and link it to the business requirement and/or to select from a list of available records (using the tickbox) and link them to the business requirement.
For Example, if you wish to see the Projects Linkage page, you can navigate through Links > Projects. Then you would be taken to a page similar to the one shown below.

You would be able to see the list of projects currently linked to the business requirement in the first section of the page. The second section allows you to search for a project, select the project using the tick box and link it to the business requirement by clicking on the 'Link' button. alternatively, you can select the projects from the available projects list by ticking the check box, and click on the 'Link' button to link them to the specific business requirement.
The same pattern is applied to Actions Linkage page and Risks Linkage page.
Below tables explain the filter options available in the respective linkage pages
Filters for searching projects:
Filters | Description |
Project Name | Type the Title of the project you would like to search for |
Project Code | Type the code of the project to search for |
Project Type | Select the type of the project from the dropdown menu |
Responsible officer | Select the responsible officer of the project from the dropdown menu |
Project Status | Select the status of the project from the dropdown menu |
Filters for searching Actions:
Filters | Description |
Action No | Type the Action Number to search for |
Action Title | Type the title of the action to search for |
Responsible officers | Select the responsible officer of the action from the dropdown menu |
Action Filters | Select an action filter from the dropdown menu |
Related plans | Select a related plan from the dropdown menu |
Status | Select the status of the action from the dropdown menu |
Filters for searching Risks:
Filters | Description |
Risk Title | Type the title of the risk to search for |
Revised Risk Rating | Type the revised risk rating to filter the risk records |
Business Units | Select the Business Unit from the dropdown menu |
Initial Risk Rating | Type the Initial risk rating |
Responsible Officer | Select the responsible officer from the dropdown menu |
Risk Type | Select a risk type from the dropdown menu |
Future Risk Rating | Select a future risk rating from the dropdown menu |
Risk Category | Select a risk category from the dropdown menu |
Risk Assessment Level | Select a risk assessment level from the dropdown menu |
Prioritisation
This page shows the prioritisation rating and the status for the specific business requirement. Rating and the status will be determined according to the prioritisation formula and status configurations used under the Administration section.

When you click on the Priorities Requirements hyperlink, you will taken to a screen shown as below.

This page shows the list of criteria along with drop down menus which consist of options attached to the respective criteria. You can select the suitable criteria options from the dropdown menu and save the selections.
