This object is used to capture key information about a project at its inception. Its inclusion in a project workflow is mandatory.
The Project Details object includes three tabs namely Project Details, Project Expenditure and Project Phase although the latter two can be switched off by your Administrator if not required.

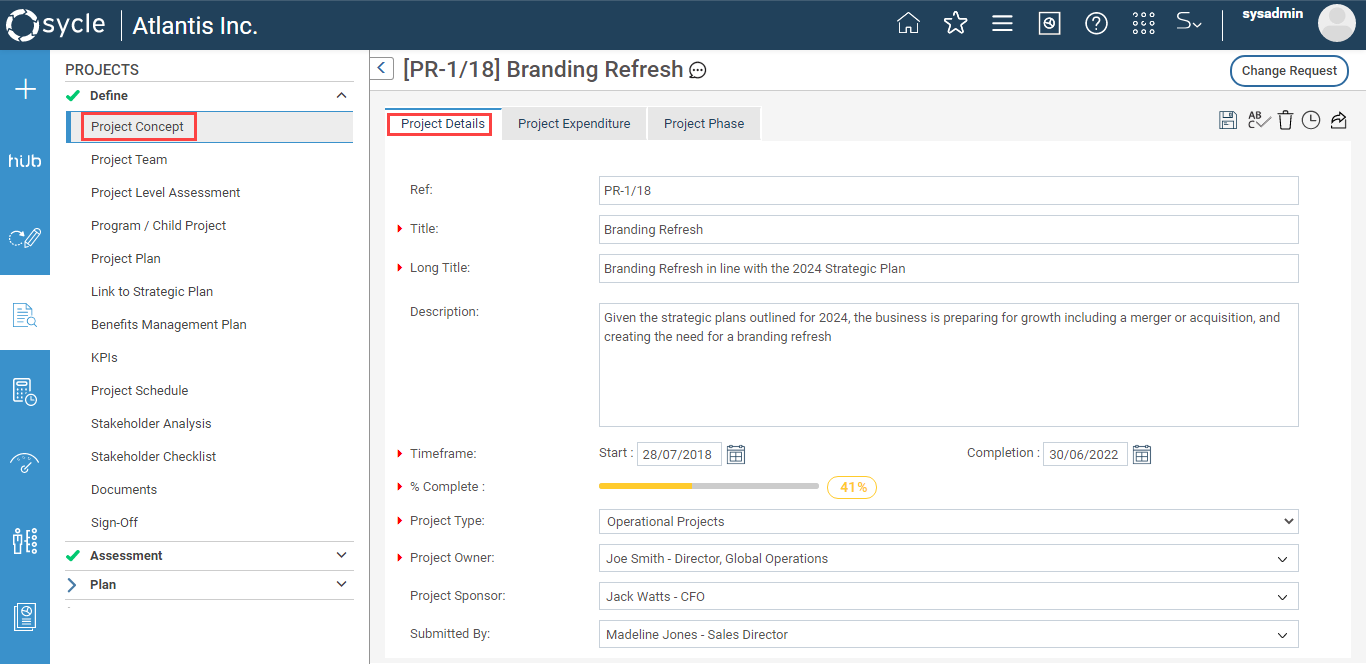
Project Details tab
The Project Details section allows you to define the important elements required to initiate the project.
STEP 1: Specify the following details to record project related information.
 | The visibility of the fields and their order can be controlled by IPM Administrator within the Framework area. |
Field | Description / Instructions | Mandatory / Optional |
Project Type | Select the relevant project type from the dropdown. Selection determines the phases and steps of the project as it is linked to a workflow. These are defined by the IPM Administrator within Settings Configuration > Project Type section. | Mandatory |
Project Title | Enter the title of the project | Optional |
Project Reference | Project reference number will be automatically assigned depending on the setting in Settings Configuration > Project Code section. This is accessible only by the IPM Administrators. You can modify the project code as per your organisational requirements. | N/A |
Is this a parent project? Is this a child project? Is this a standalone independent project? | This selection allows you to build a project hierarchy within all projects in the system.
| Mandatory |
Short Title | Add a short title for the project | Optional |
Project Description | A brief description regarding the purpose of the project | Optional |
Project Category | Select the correct project category. Used to categorise the project as per list of categories defined by your administrator via Settings configuration > Custom Lists section. | Optional |
Project Owner | Specify the staff member who is the owner/ responsible person of the project. Staff members are defined by interplan® Administrator. | Mandatory |
Submitted By | Specify the staff member who initiates the project. | Optional |
Project Sponsor | Allows you to select a staff member as the sponsor, who provides high level advice and support for the project. | Optional |
Time Frame | Start and expected End date of the project. | Mandatory |
Project Start and End Date | Allows you to define the project start and end dates. | Mandatory |
Project Justification | A brief justification for initiating the project. | Optional |
Councillor Interest | Selecting this tick-box indicates whether the 'Councillor' is interested in the project. | Optional |
| Asset | Select an asset for the project | Optional |
| Dropdown Service Profile | Select a primary service profile to be linked to the project | Optional |
| Secondary Service Profile | Select one or multiple secondary service profile(s) to be linked to the project | Optional |
| Capital Amendment | Enter a comment on capital amendment of this project | Optional |
| Exception | Enter a comment on any exceptions | Optional |
| Programme Summary | Enter a programme summary | Optional |
| Hyperlink URL | Enter a URL of a related hyperlink | Optional |
| Budget Overall | Enter the overall budget of the project | Optional |
| Related Projects | Enter information on related projects, if any | Optional |
| Projected Status | Select the status of the project | Optional |
| Project Status Graph | View a graphical interface on how the project progresses | Optional |
| Percent Complete | View the progress percentage of the project | Optional |
| Project Comment | Enter a comment on the project's progress | Optional |
| Working Hours | View the no working hours in the organization | Optional |
| Risk Traffic Light | Select the status of risks associated with the project | Optional |
| Issue Traffic Light | Select the status of issues associated with the project | Optional |
| Scope Traffic Light | Select the status of the scope associated with the project | Optional |
| Risk Comment | Enter a comment on the risk status | Optional |
| Issue Comment | Enter a comment on the issue status | Optional |
| Scope Comment | Enter a comment on the scope status | Optional |
| Look Ahead | Enter a comment on the project's future status | Optional |
| Financial Comment | Enter a comment on the financial status | Optional |
| Current Financial Year Percent Complete | View the progress percentage of the project for the current financial year | Optional |
| Custom Text Field 1-10 | Customisable text fields | Optional |
| Custom Tick Box 1-10 | Customisable tick boxes | Optional |
| Section Header 1-5 | Customisable sectional header fields that can be used to separate sections in the Details object | Optional |
| Custom Staff List 1-6 | Allows you to add staff members | Optional |
| Custom Traffic Light Field1-10 | Traffic Light fields which allow you to use customized options for performance. The options shown here are defined through the Project Settings > IPM Lists page by your administrator. | Optional |
| Custom Numeric Field1-10 | Customisable numeric fields | Optional |
| Custom List1-10 | Customisable dropdown list fields. The options shown here are defined through the Project Settings > IPM Lists page by your administrator. | Optional |
| Custom Date 1-5 | Customisable date fields | Optional |
| Custom Area Field 1-10 | Customisable text area fields | Optional |
STEP 2: In order to record asset details, click on the 'Select' button.

STEP 3

STEP 4: Select an asset from the grid and click on the 'Confirm' button.
Please note that a project can be associated with only one asset.
A project can be linked to multiple service profiles in Camms.Strategy from which one would be selected as the primary service profile. This link establishes a project link to the organisational hierarchy in Camms.Strategy.

STEP 5 : In order to define a primary service profile, click on the ‘Select’ button next to 'Service Profile' field. A popup will open allowing you to select the Primary Service Profile from the hierarchy tree.
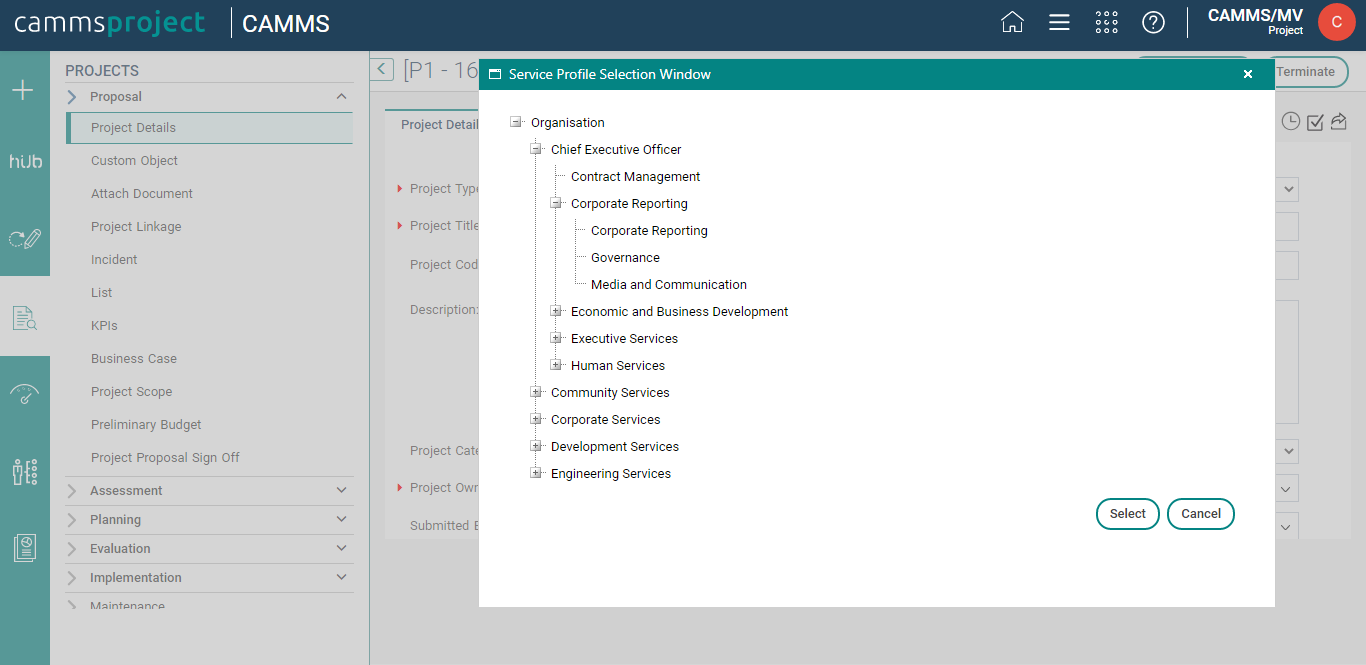
STEP 6 : Similarly, secondary service profiles can be added.
 | Clicking on the ‘Remove’ button adjacent to secondary service profiles will remove all selected service profiles. To remove a particular service profile, click on the ‘Select’ button and deselect the service profiles that need to be removed. |
STEP 7: Click 'Save' icon to save the details.
 | The Project type selected for a particular project will determine the project workflow as each project type is linked to a project workflow by the IPM Administrator. Hence, the phases, their sub-sections and sub section properties (project title, project type, etc.) of your new project, will be entirely dependent on the selected 'Project Type'. Once the project has been saved, the remaining tabs in the phase get activated. |
Project Expenditure tab
STEP 1: Click on the 'Project Expenditure' tab.
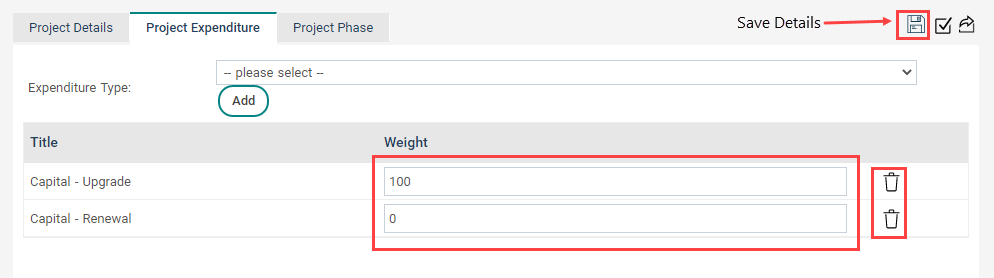
This section allows you to record multiple expenditure types for a project. The Expenditure type defines the major budget type of the project.
The budget types are defined by the IPM Administrator in Setting Configuration > Budget Type section.
STEP 2: Select the relevant 'Expenditure Type' from the dropdown. Click on the 'Add' button.

STEP 3: For each expenditure type, specify the weight. Click 'Save' to save the details.
STEP 4: If you want to delete an expenditure type, click on the adjacent 'Delete' icon.
 |
|
Project Phase tab
The Project Phase tab within Project Details object has a very limited functionality. It was developed as part of the very first version of Camms.Project before workflows were introduced. Since then, workflows are further developed by adding sign offs.
STEP 1: Click on the 'Project Phase' tab.
The time line for each project phase can be configured within this section. You can specify a 'Start date' and 'End Date' for each and every phase of the 'Project Work Flow'.
STEP 2: Click on the 'Add new Phase' icon

STEP 3: Enter the Phase Name and Phase Code. Then click 'Insert'.
STEP 4: After defining a project phase, you can add start and end dates for the particular project phase.

STEP 5: Once saved, you can move the phases using the up and down arrows.

 | Business Rules
|
Exporting information in the Details object
You can export information available in Project Details, Project Expenditure and Project Phases tabs directly to PDF, Microsoft Word or Microsoft Excel files by clicking on the Export icon available on the top toolbar.
Upon clicking the ‘Export’ icon, you will see a preview of information within the respective object on a new browser tab (shown below).

Click on ‘Export dropdown menu’ icon and select the preferred export format from the menu to download the file in the selected format.
