View Agenda Template
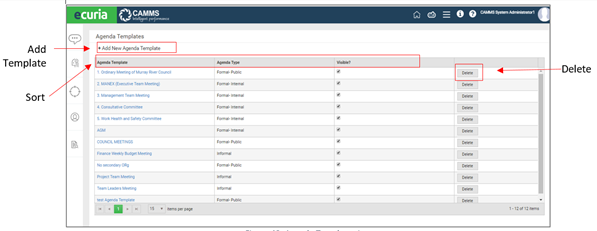
All report templates will be listed by Template Title in an alphabetical order in a grid view as per the below figure. The user can select the items viewed per page from the drop down.
The records can be sorted by clicking the Column Name. For Example; If the user clicks ‘agenda template” the records will be sorted on template name in alphabetical order.
The template can be deleted by clicking on the ‘Delete’ button if the report is not linked with one or more Agenda templates.
Add Agenda Template
The agenda template is used to create pre-defined agenda which can be used to create multiple meeting reports. An agenda template is created for a meeting type (i.e. Formal Public, Formal Internal and informal).
To add an agenda template, the following steps, have to be followed.
- STEP 1: Click on the hamburger menu icon in the header and click on ‘Agenda Templates’.
- STEP 2: Click on ‘Add new agenda template’ link on the view page.
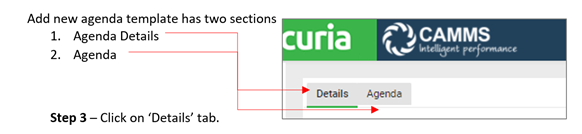
Create Agenda Detail
An agenda template has two sections, the agenda details and the agenda. To create agenda detail the following steps have to be followed.
- STEP 1: Create Agenda Details
These are the basic details of the agenda. The fields defined in this area will be listed when creating a meeting.

I. Agenda Template – Enter the template name. This is the Name of the template which, is a mandatory field.
II. Agenda Type - Select from the three types of agendas. Formal Public, Formal internal and Internal.
III. Link Report Template – The agenda template needs to be linked with one or more report templates. The report template can be used to create the agenda item. On default the previous meeting minutes’ report will load on default which can be changed by the user.
IV. Default Committees - Select one or more member committees participating in the meeting. The members of the selected committees will auto populate in the ‘members’ field in create the meeting.
V. Default Teams – Select one or more teams participating in the meeting. The members of the selected teams will auto populate in the ‘participants’ field in creating meetings.
- STEP 2: Customise the field types
As shown in the below figure, the field configuration grid, allows to select the fields of the meeting. The user can edit the field display label, include a tooltip, and select to make fields mandatory and visible. These selected fields populated the ‘Create Meeting’ page. Some of the custom fields are listed below:
i. Agenda Deadline – This is to set a deadline date for the agenda. On default the agenda date will be 7 days prior to meeting commencement date.
ii. Response Options
iii. Confidential Reasons
iv. Issues considered when writing the report
v. Present
vi. Voting
vii. Decision making authority

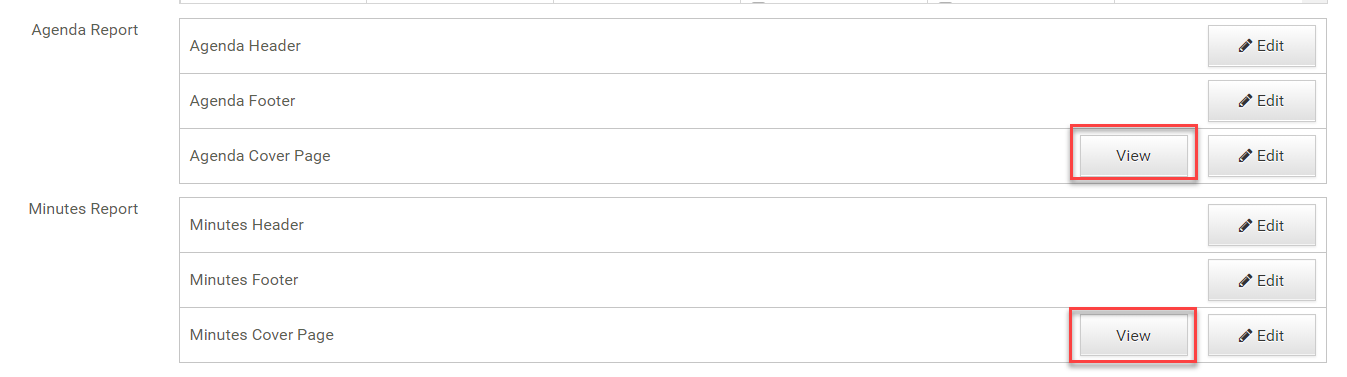
- STEP 3: Design Cover page, Header and Footer for Agenda and Minute Report
The Administrator can design the Cover page, Header and Footer for the report outputs. This needs to be designed and saved separately.

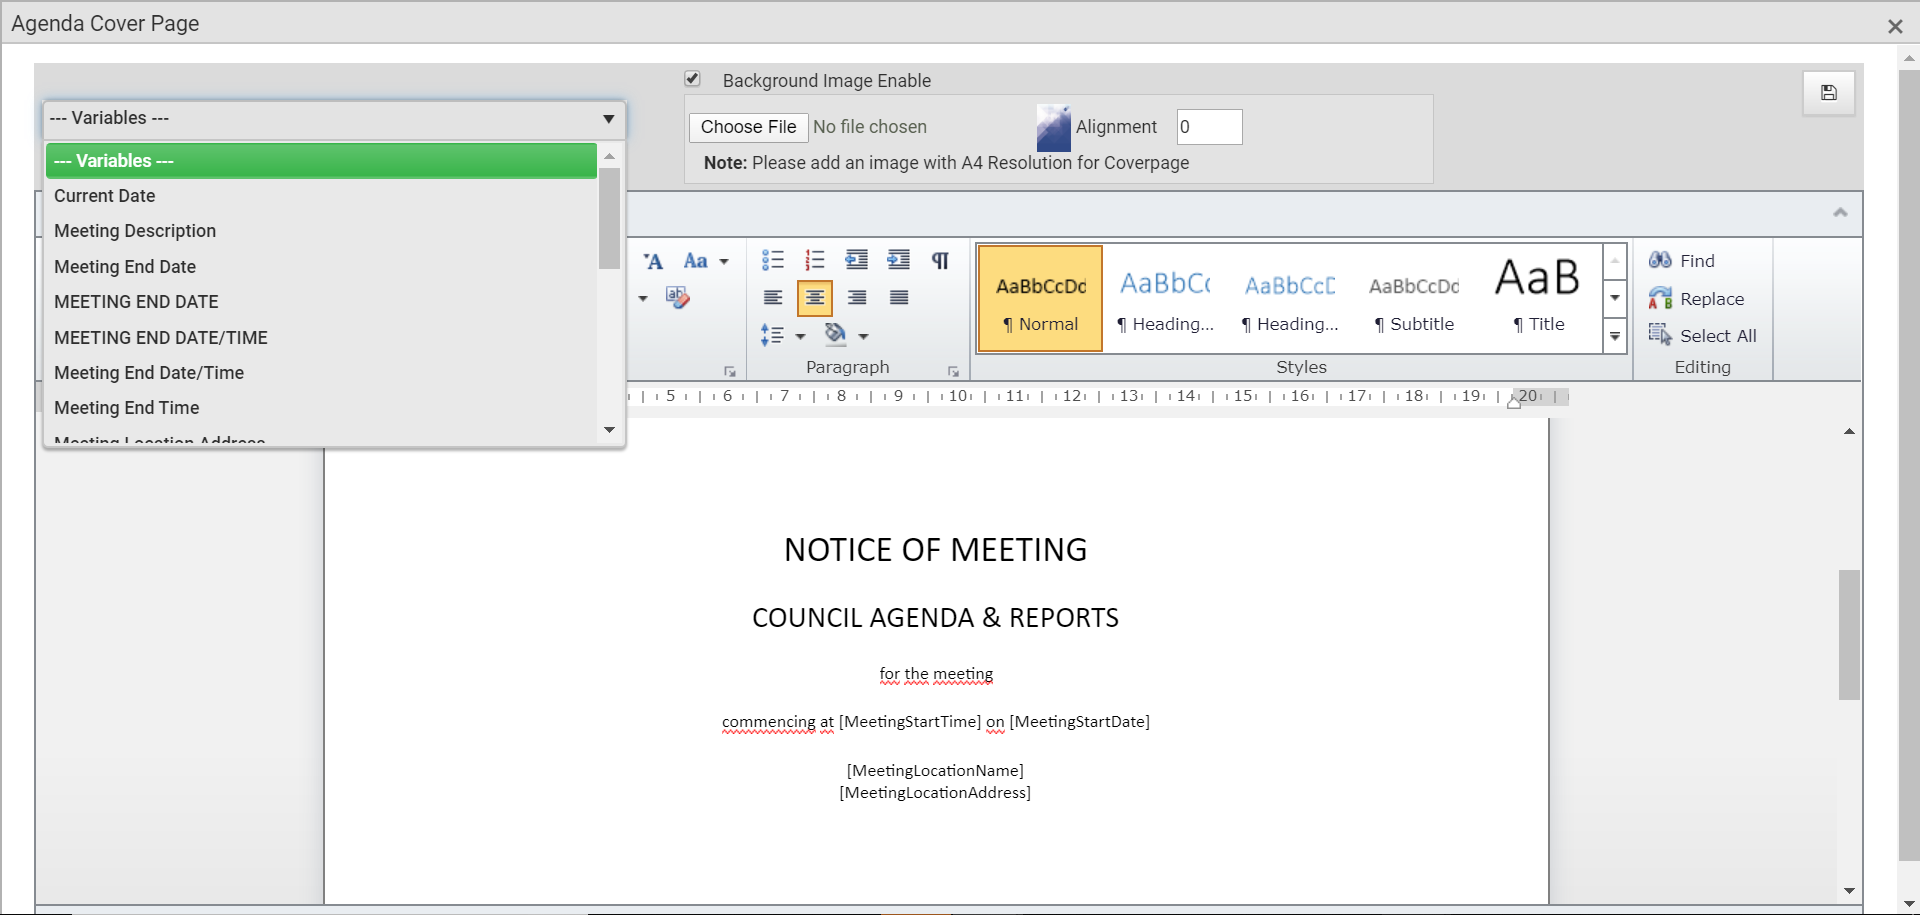
Designing a cover image
Click on the ‘Edit’ button to design the cover page. This will open a rich text editor and the cover page can be designed using images and text. A background image can be inserted using the ‘Inline image’ option from the insert menu tab. In order to apply the image as a background image, the user should tick the ‘Background image Enable’ tick box.
The user can also select variables to customise the cover page from the ‘Variables’ drop down as shown in the below figure.

Place text on top of the image and format it accordingly.
The user can place text on top of the image, where the image needs to be sent behind the text. Click on the image, go to ‘Format’, click on ‘Wrap text’ and select ‘Behind Text’.

Insert variables from the Variable drop down
Auto text variables can be inserted in to the background image. To insert variables, click on the ‘Variables’ drop down and apply the necessary text formatting. The variables will auto populate when the Agenda or Minute report is generated.
Preview the design
The user can preview the report cover image design by using the ‘View’ option or by generating the respective report output in the application.
Designing Header/Footer
Click on the ‘Edit’ button to design the cover page, which will open a pop up as shown in the below figure.

The following steps need to be followed:
- Upload a pre designed background image to fit the header area. The image width should not exceed 1000 pixels and the height should not exceed 65 pixels.
- Insert text into the header area. The text can be formatted using basic options such as Text alignment, Font Size, Font Colour and Bold/Italics styles.Note: If a background image has been inserted, the text will appear on top of the image.
- Insert Variables into the header area. The available variable options are ‘Page Number, One of the Total pages. And Current Date. Text of the variables can be formatted using basic formatting options of Text alignment and Text colour.
- STEP 4: Click ‘Save’ the Agenda template to update.
Create Agenda
The agenda tab will allow the admin to create the agenda template of a meeting. This agenda template can be edited, by the meeting organizer in the ‘Meeting preparation’ stage. The following step needs to be followed to create an agenda.
- STEP 1: Click on ‘Agenda Tab’ to Create Agenda
This is the agenda schedule of the meeting. The user can create the agenda by adding agenda groups and agenda items for each group. All agenda groups and agenda items created in the agenda template will be pre-populated at the meeting preparation stage.
If the template needs to be edited, it needs to be done by the administrator.
Note: Any meetings that have been created linking the agenda template prior to any edits, those changes won’t be reflected In the agenda of such meetings. |
Following are the standard action icons on the Agenda page.

Table 4 : Agenda Template Action Icon
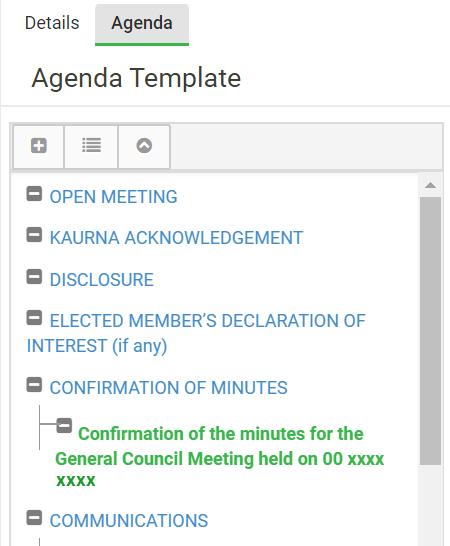
- STEP 2: Add Agenda group
An Agenda group is a main agenda topic. This will have many agenda items.
1. Title – The Agenda Group Name
2. Description – Description for the Agenda group

- STEP 3: Add Agenda Item
An agenda item is a sub topic for an agenda group. An Agenda item can be marked as confidential. If marked confidential the item will be made visible only for the report creator, report writer and report prepared by users. However, this can be edited by granting permission by the Report creator at the meeting preparation to enable report viewing rights for defined confidential users for a specific item and global confidential users. If the Agenda creator doesn’t set the confidential users, this will not be visible to any of the meeting participants and/or members.
The fields of Add agenda item are explained below:
- Title – This is the name of the Agenda Item. This is a mandatory field.
- Report Template – Select the report template to create the Agenda Item. The drop down will list all the reports linked with the Agenda template. The fields of the Agenda item get populated based on the selected report. This is a mandatory field.
- Report Writer – The default report writer will be the person assigned by the system administrator when creating the agenda template – agenda item. But this can be changed by selecting a staff name from the drop down.
- Report Prepared – The default report prepared will be the person(s) assigned by the system administrator when creating the agenda template – agenda item. The agenda creator can assign him/herself as well. This can be changed by selecting one or more persons from the staff name drop down.
- Custom Fields – There will be custom fields that can be included in the agenda item. These are populated based on the configuration of the Report template.
- STEP 4: Click ‘Save’ to update agenda item details
Copy Agenda Template
An existing agenda template can be copied, by clicking the Copy icon within an existing agenda template. The copied agenda can be renamed.