Project Linkage object allows you to identify projects linkages in the organisational and planning hierarchies. A Project can be linked to strategies, service profiles and to specific funding partners. However, the latter two can be switched off by your Administrator if not required.

Project Linkage Strategy Section
In order to link a project to an action or a task, you should first choose the correct strategy.
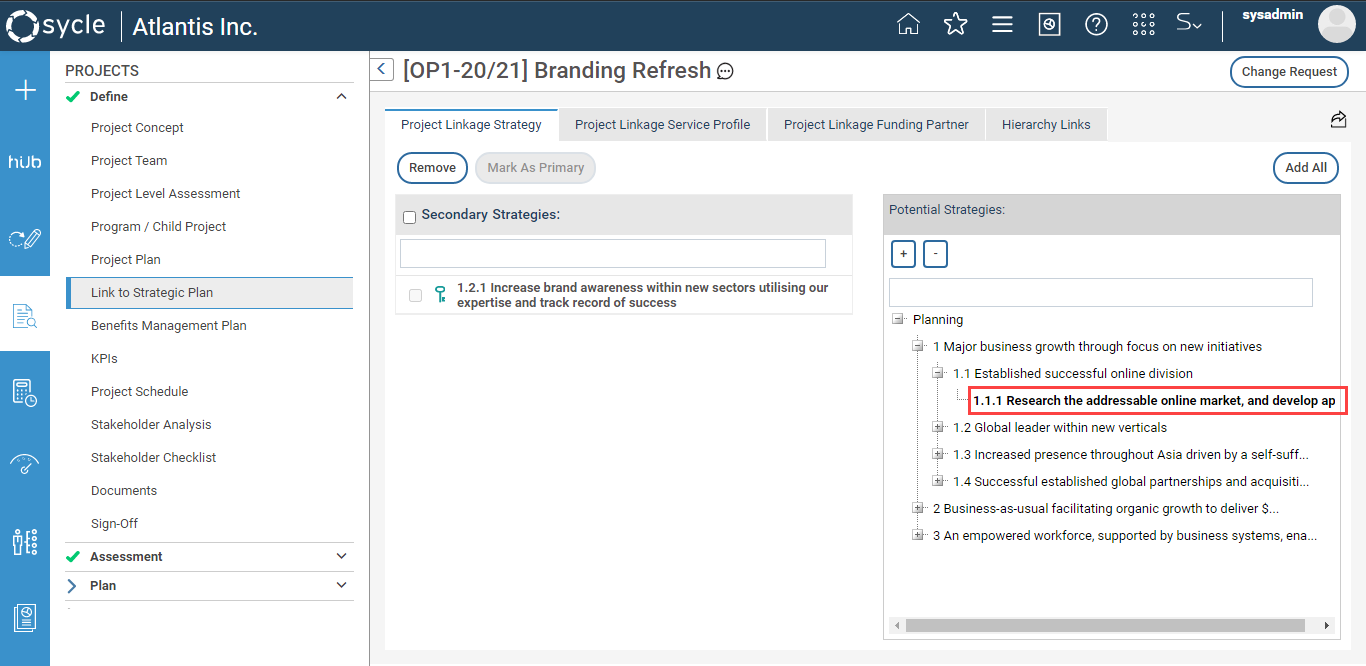
STEP 1: Navigate to the Project Linkage object and click on the 'Project Linkage Strategy' tab.
 STEP 2: To add a potential strategy, expand the planning hierarchy till you reach the 'Strategy' level of the hierarchy, or search for the strategy by typing in its title in the text box available above the hierarchy and then by pressing the Enter key on your keyboard. The strategies will be highlighted as shown below;
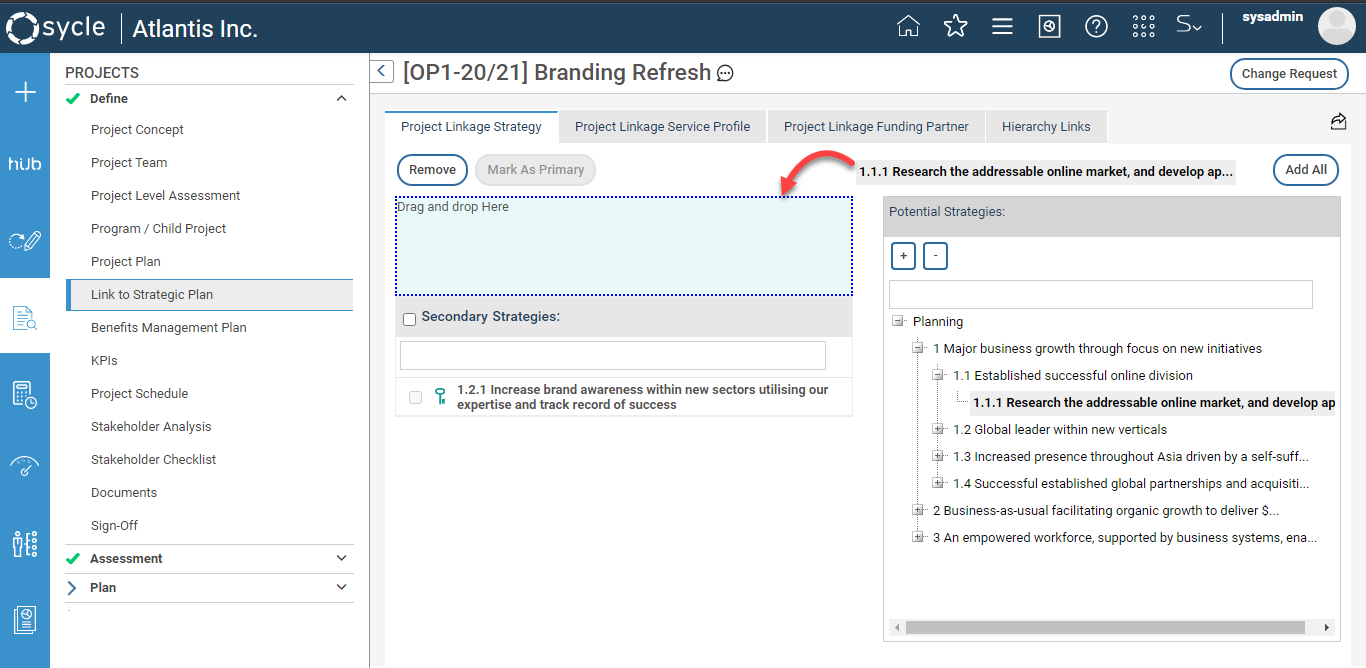
STEP 3:Drag and drop the selected strategy on to the drag and drop area.
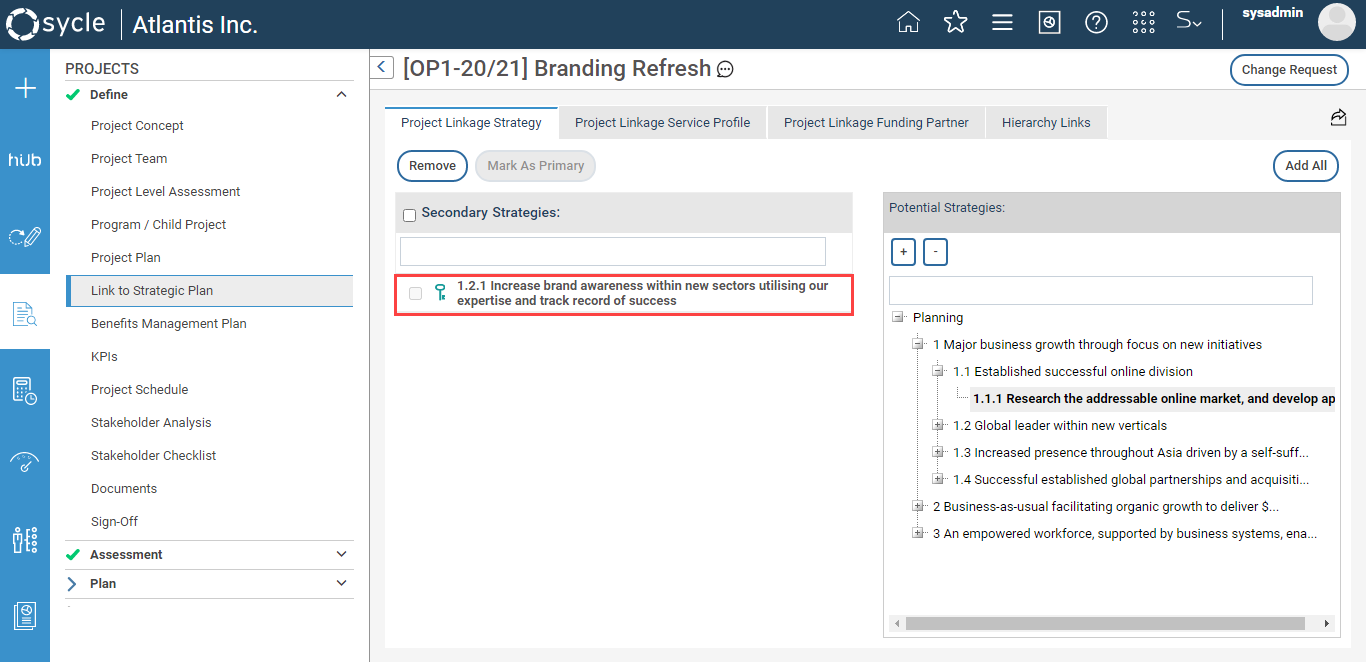
You can use the remove button to remove any strategy. Select the strategy by selecting the tick box next to it and the click on the 'Remove' button.

You can also mark a strategy as 'Primary' by clicking on the 'Mark As Primary' button. Then the particular strategy will be highlighted.
 | If the selected project has been linked to an action then you will still be able to modify the 'Strategy' from this section (by selecting the relevant strategy and then by clicking on the Mark as Primary button). The changes done to the primary strategy of the project will reflect on the linked action, and vice versa. |
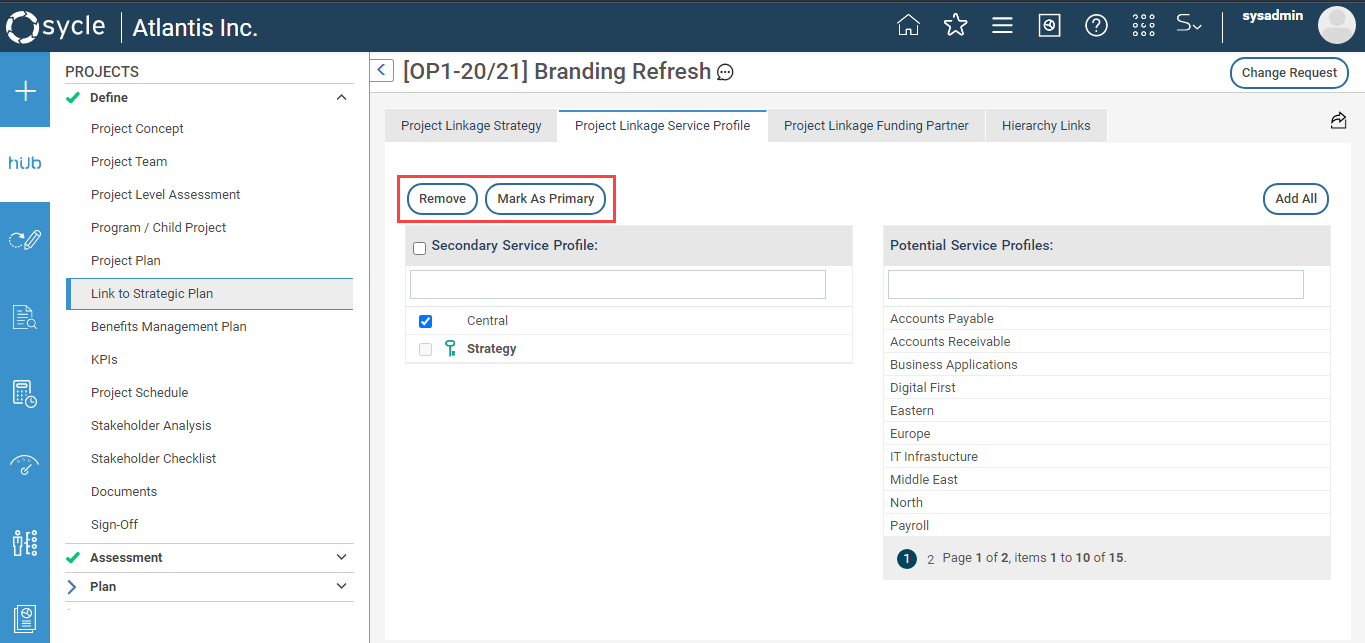
Project Linkage Service Profile Section
As part of the Project Linkage object you will be able to link the project to a Service Profile. This linkage will in turn link the action or task to a business unit.
| If you link a project to a service profile, it will appear in the ‘Project Risks’ in the ‘Risk’ area. Once the project is approved, it will be listed in the ‘Project Risk’ area under its corresponding Business Unit. This will facilitates you to manage your risk assessments through the ‘Risk’ area as well as the ‘Risk Assessment’ object within the ‘Project’ area. |

STEP 1: Navigate to 'Project Linkage Service Profile' tab. If you select a service profile within 'Project Detail' it will be displayed and you can add a secondary service profile by selecting another service profile.

STEP 2: To add a service profile as a secondary service profile, select the service profile you want to add from the potential service profiles column and then drag and drop to secondary service profile section.

Then, it will appear under the secondary service profiles column.

You can use the remove button to remove any service profile from the secondary service profiles column. Select a service profile and click on 'Mark As Primary' button to make the selected service profile as the primary one.
| If the selected project has been linked to an action then you will still be able to modify the 'Service Profile' from this section (by selecting the relevant service profile and then by clicking on the Mark as Primary button). The changes done to the service profile of the project will reflect on the linked action, and vice versa. |
If the rollover process is executed then the following screen with two additional controls will be displayed within the tool bar as shown.

 | Business Rule After commencing the rollover functionality you could link both current and next period strategies of the application to the project. If the user prefers to continue the project linkage with next period service profiles, first you need to select the 'Next Period' control from the tool bar and then select the required strategy from the next period. |
Project Linkage Funding Partner
You can define the funding partners associated with the project within this section.
STEP 1: Go to 'Project Linkage Funding Partner' tab.
STEP 2: Select the relevant funding partners from the 'Potential Funding Partner' list and drag and drop to 'Linked Funding Partner' list.

STEP 3: In order to remove funding partner(s), select the funding partners to be removed and click on the 'Remove' button.
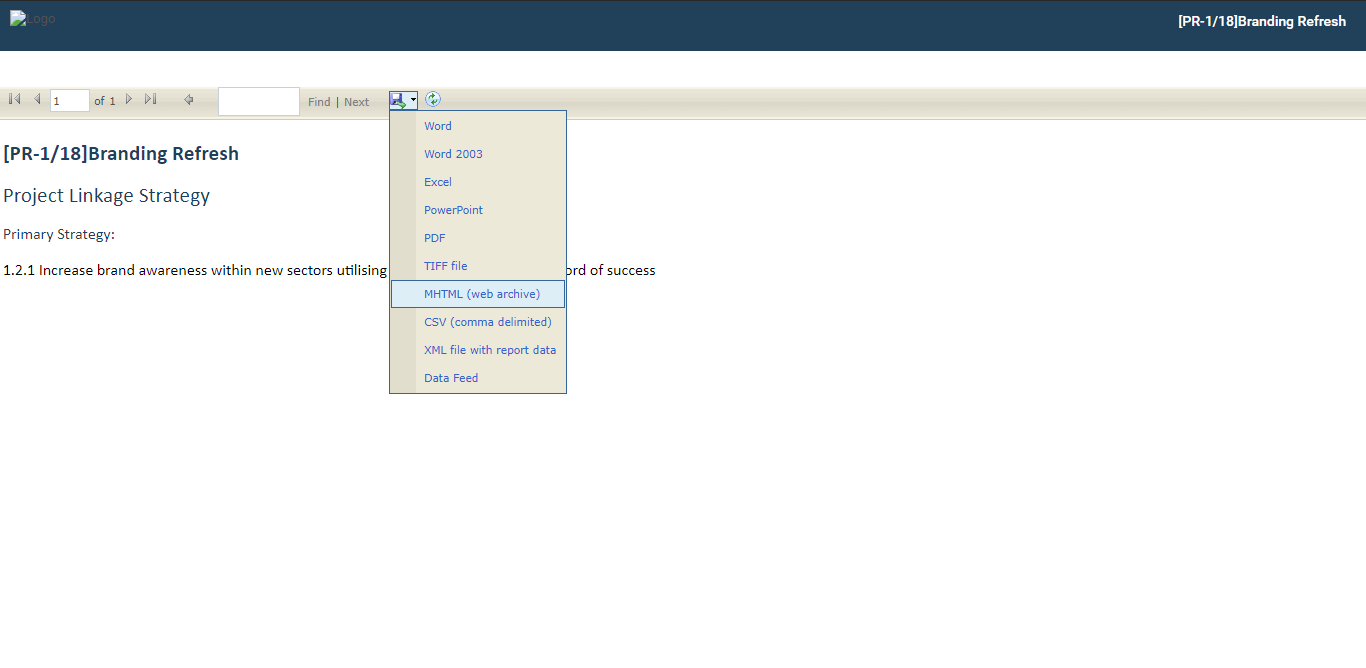
Exporting information in the Project Linkage object
- You can export information in each tab of the object separately to formats such as PDF, Word, Excel etc. by clicking on the ‘Export’ icon on the top toolbar.
- Upon clicking the ‘Export’ icon, you will see a preview of information within the relevant tab on a new browser tab.
- Click on ‘Export dropdown menu’ icon and select the preferred export format from the menu to download the file in the selected format.